To help us provide you with free impartial advice, we may earn a commission if you buy through links on our site. Learn more
There’s not much of a learning curve to GarageBand, but there are a few features that are worth seeking out as you get started. First of all, plug in a pair of headphones, as the internal speaker can’t hope to do it justice. If you want to play through speakers, it’s best to use the headphone socket and find a suitable cable to plug into your speakers. Bluetooth or Airplay will result in a delay between playing a note and hearing it, which will make it extremely tricky to perform.
The app starts with a list of existing songs, and tapping the + button starts a new one. You’ll then be given a choice of instruments, which we’ll cover in more detail below. For now, choose Keyboard, as this is one of the simpler ones. You’ll see an icon of a grand piano and a keyboard. Tap the icon to change instrument, and the keyboard to play it.
The iPad recognises up to 10 fingers, and while it’s a bit of a squeeze fitting 10 fingers onto the virtual keyboard at once, it’s no problem to play chords with three or four fingers. However, four or more fingers may be mistaken for multitasking gestures and cause the device to switch to another app. If this happens, it’s probably best to disable Multitasking Gestures in the iOS Settings, under the General tab.
Back in GarageBand, tap the spanner icon to set the tempo, key and time signature of the composition. The tempo is how fast the music is. The key is the root chord, the one that feels like the home of the song. The time signature is the number of beats in the bar. 4/4 means four beats to a bar, and nearly all pop music uses this time signature, but 3/4 and 6/8 can make for a refreshing change. They also unlock additional sets of musical phrases for the Smart Instruments (more on this below).
Record a performance at any time simply by hitting the red button at the top. You’ll hear a one-bar count in and then you’re off. At first it’s useful to hear a metronome to keep you in time with GarageBand’s tempo, but as you layer up instruments you might prefer to switch it off via the Metronome switch just above the Tempo settings.
By default, GarageBand records in eight bar sections that loop automatically, but we don’t find this particularly useful. To fix this, tap the + symbol near the top-right of the screen to reveal the Song Sections controls. Tap where it says 8 bars and enable Automatic mode. This makes Section A expand to fit whatever you record into it.
Once you’ve recorded an instrument, it’s time to add another. Tap Instruments and you can plough straight ahead, but you may want to visit the sequencer screen first – tap the button with an icon that resembles three rows of bricks. The sequencer shows a track for each instrument, and horizontal blocks for each recorded performance.
The instruments are where the fun stuff happens, so let’s take a look at what’s on offer.
Keyboard
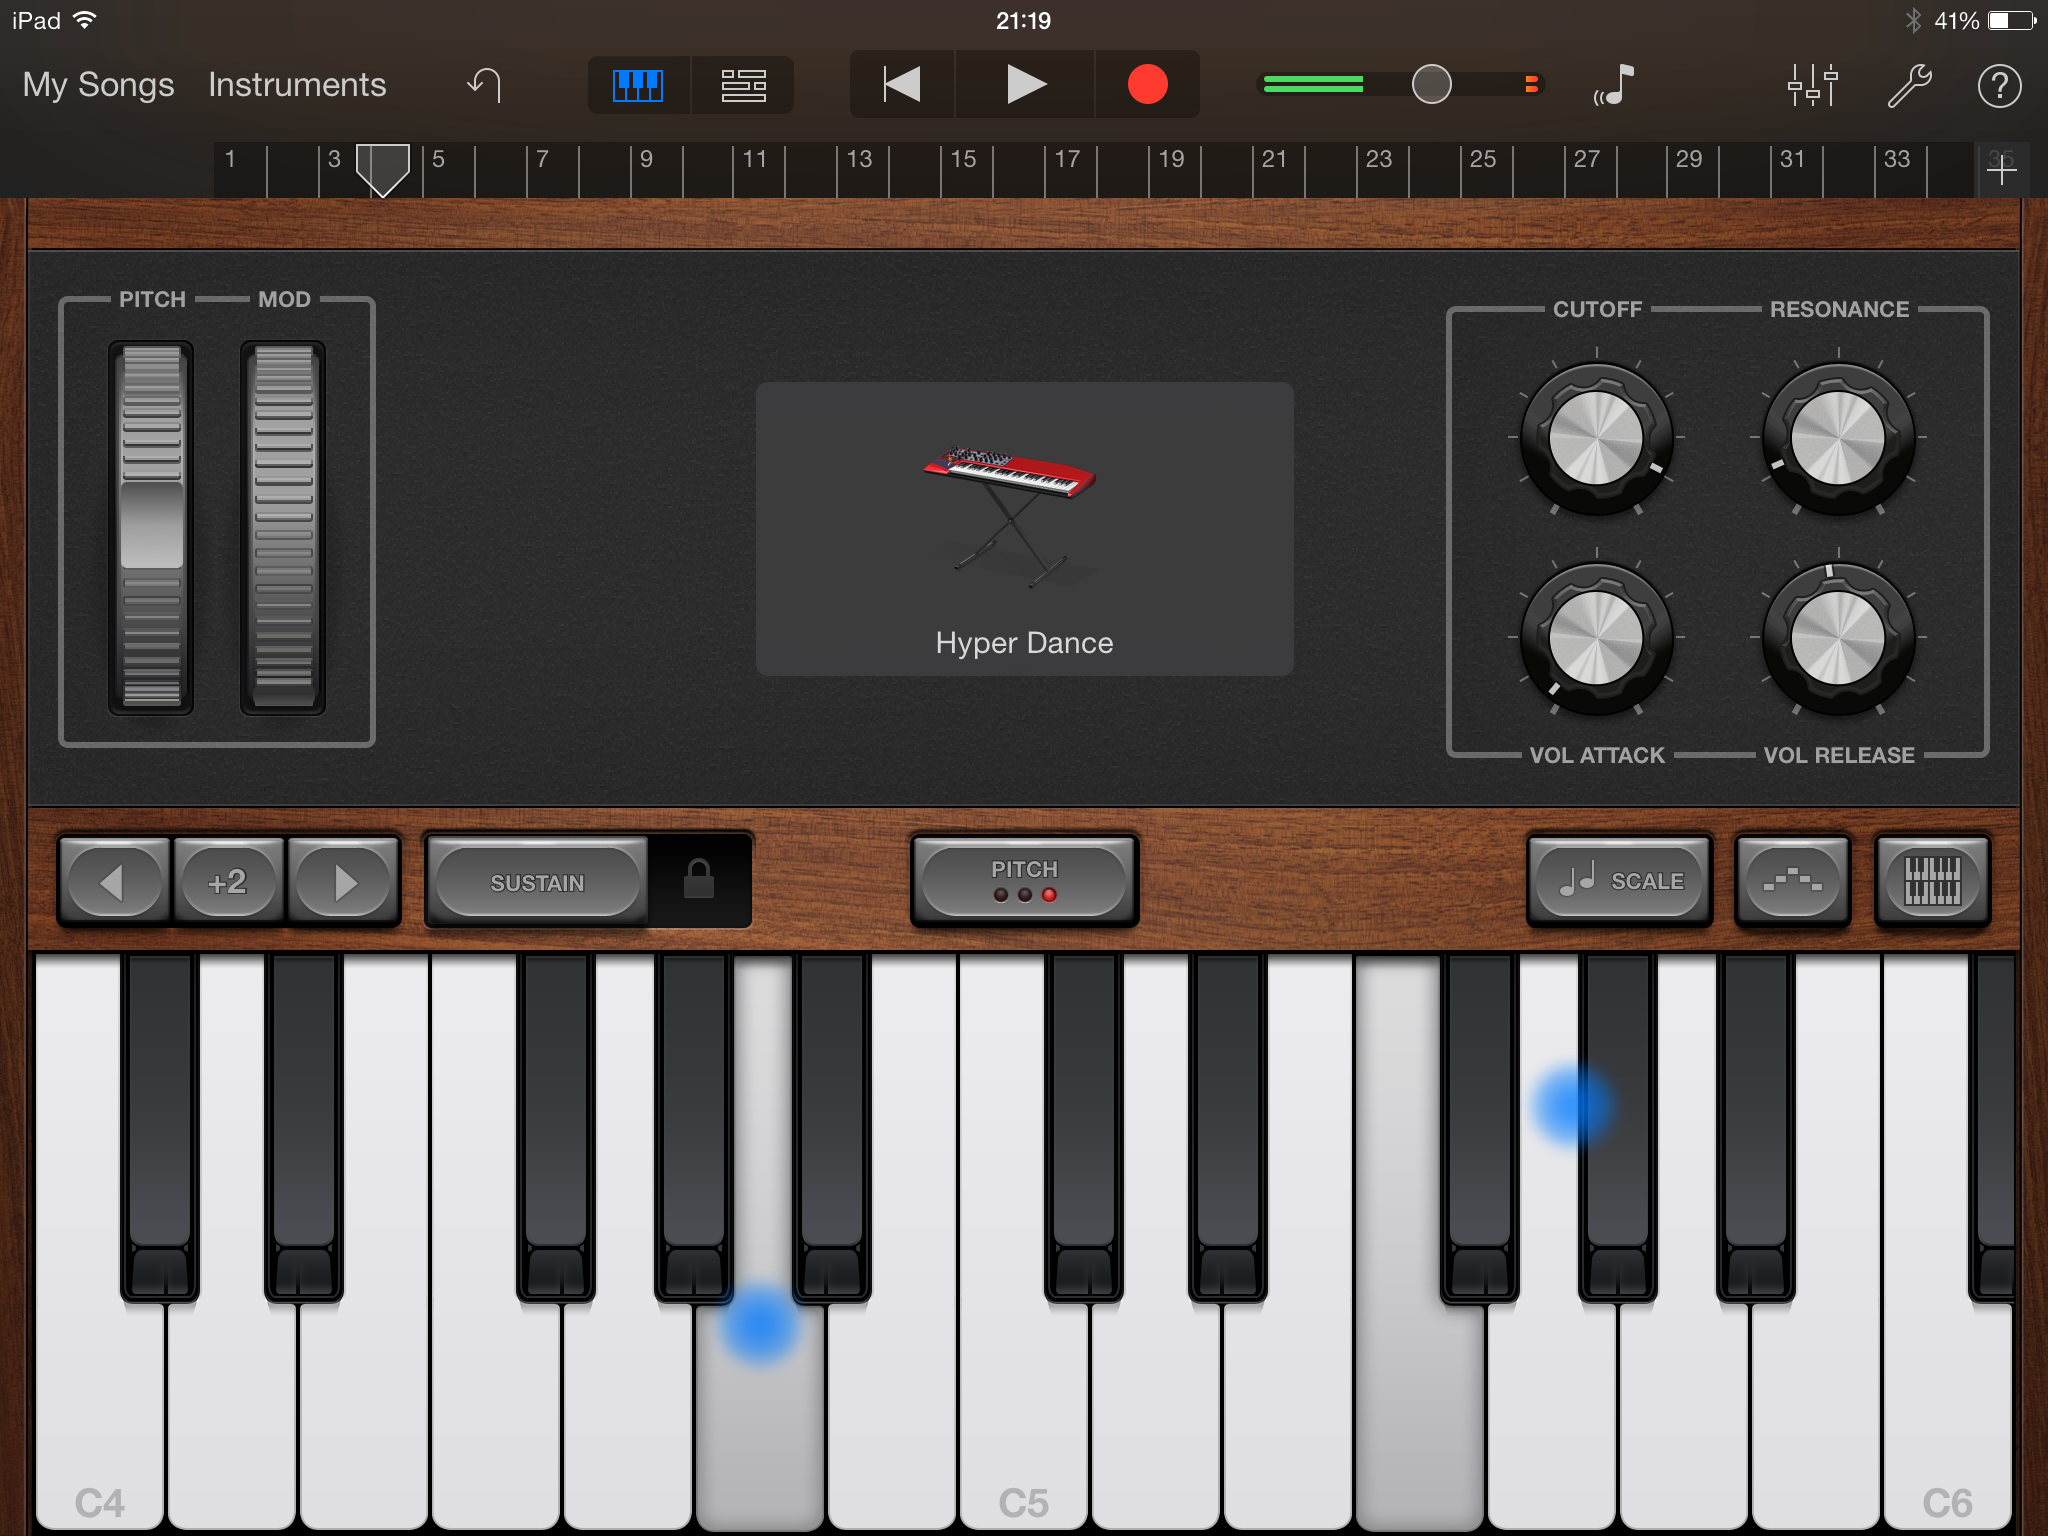
We’ve already touched on the Keyboard, but there’s actually quite a lot of sophistication in this seemingly simple instrument. Just above its virtual keys is a row of buttons that determine how it responds to user input. Starting from the left, the octave buttons jump to higher and lower parts of the keyboard. Sustain is like a sustain pedal on a piano, so enabling it makes notes ring out after the key has been released. This control is a switch that can be left either on or off, but it can also be used as a button to momentarily reverse its setting. For example, you might want piano notes to be sustained for most of a performance, but to cut them off each time the chord changes.
The centre button determines what happens when you glide a finger across the keyboard. The default is glissando mode, which behaves in the same way you’d expect from a physical keyboard. Scroll mode lets you shift the keyboard to the right or left to reveal lower or higher notes. Pitch mode isn’t available for piano and organ sounds, but it appears for the other categories. It creates gliding pitch bends that follow your finger movement around the keyboard. It’s even possible to have two or more notes that follow independent trajectories – something that’s impossible with a conventional MIDI-based instrument. Enabling pitch mode also unlocks the ability to change the tone of some sounds by sliding a finger vertically along the key.
If you’re struggling to hit the right note, tap the Scale button and select a preset scale. Major and Minor are the most common types, but there are lots of others available if you fancy something a bit fruitier. The button on the right makes the keyboard wider or narrower, and has an option to show two rows. The remaining button that resembles five little steps is the arpeggiator. Turn it on and hold down a few notes and you’ll hear rippling cascades of music, locked to the tempo of the track. You’ll find various additional setting to vary the speed, direction and range of the notes.
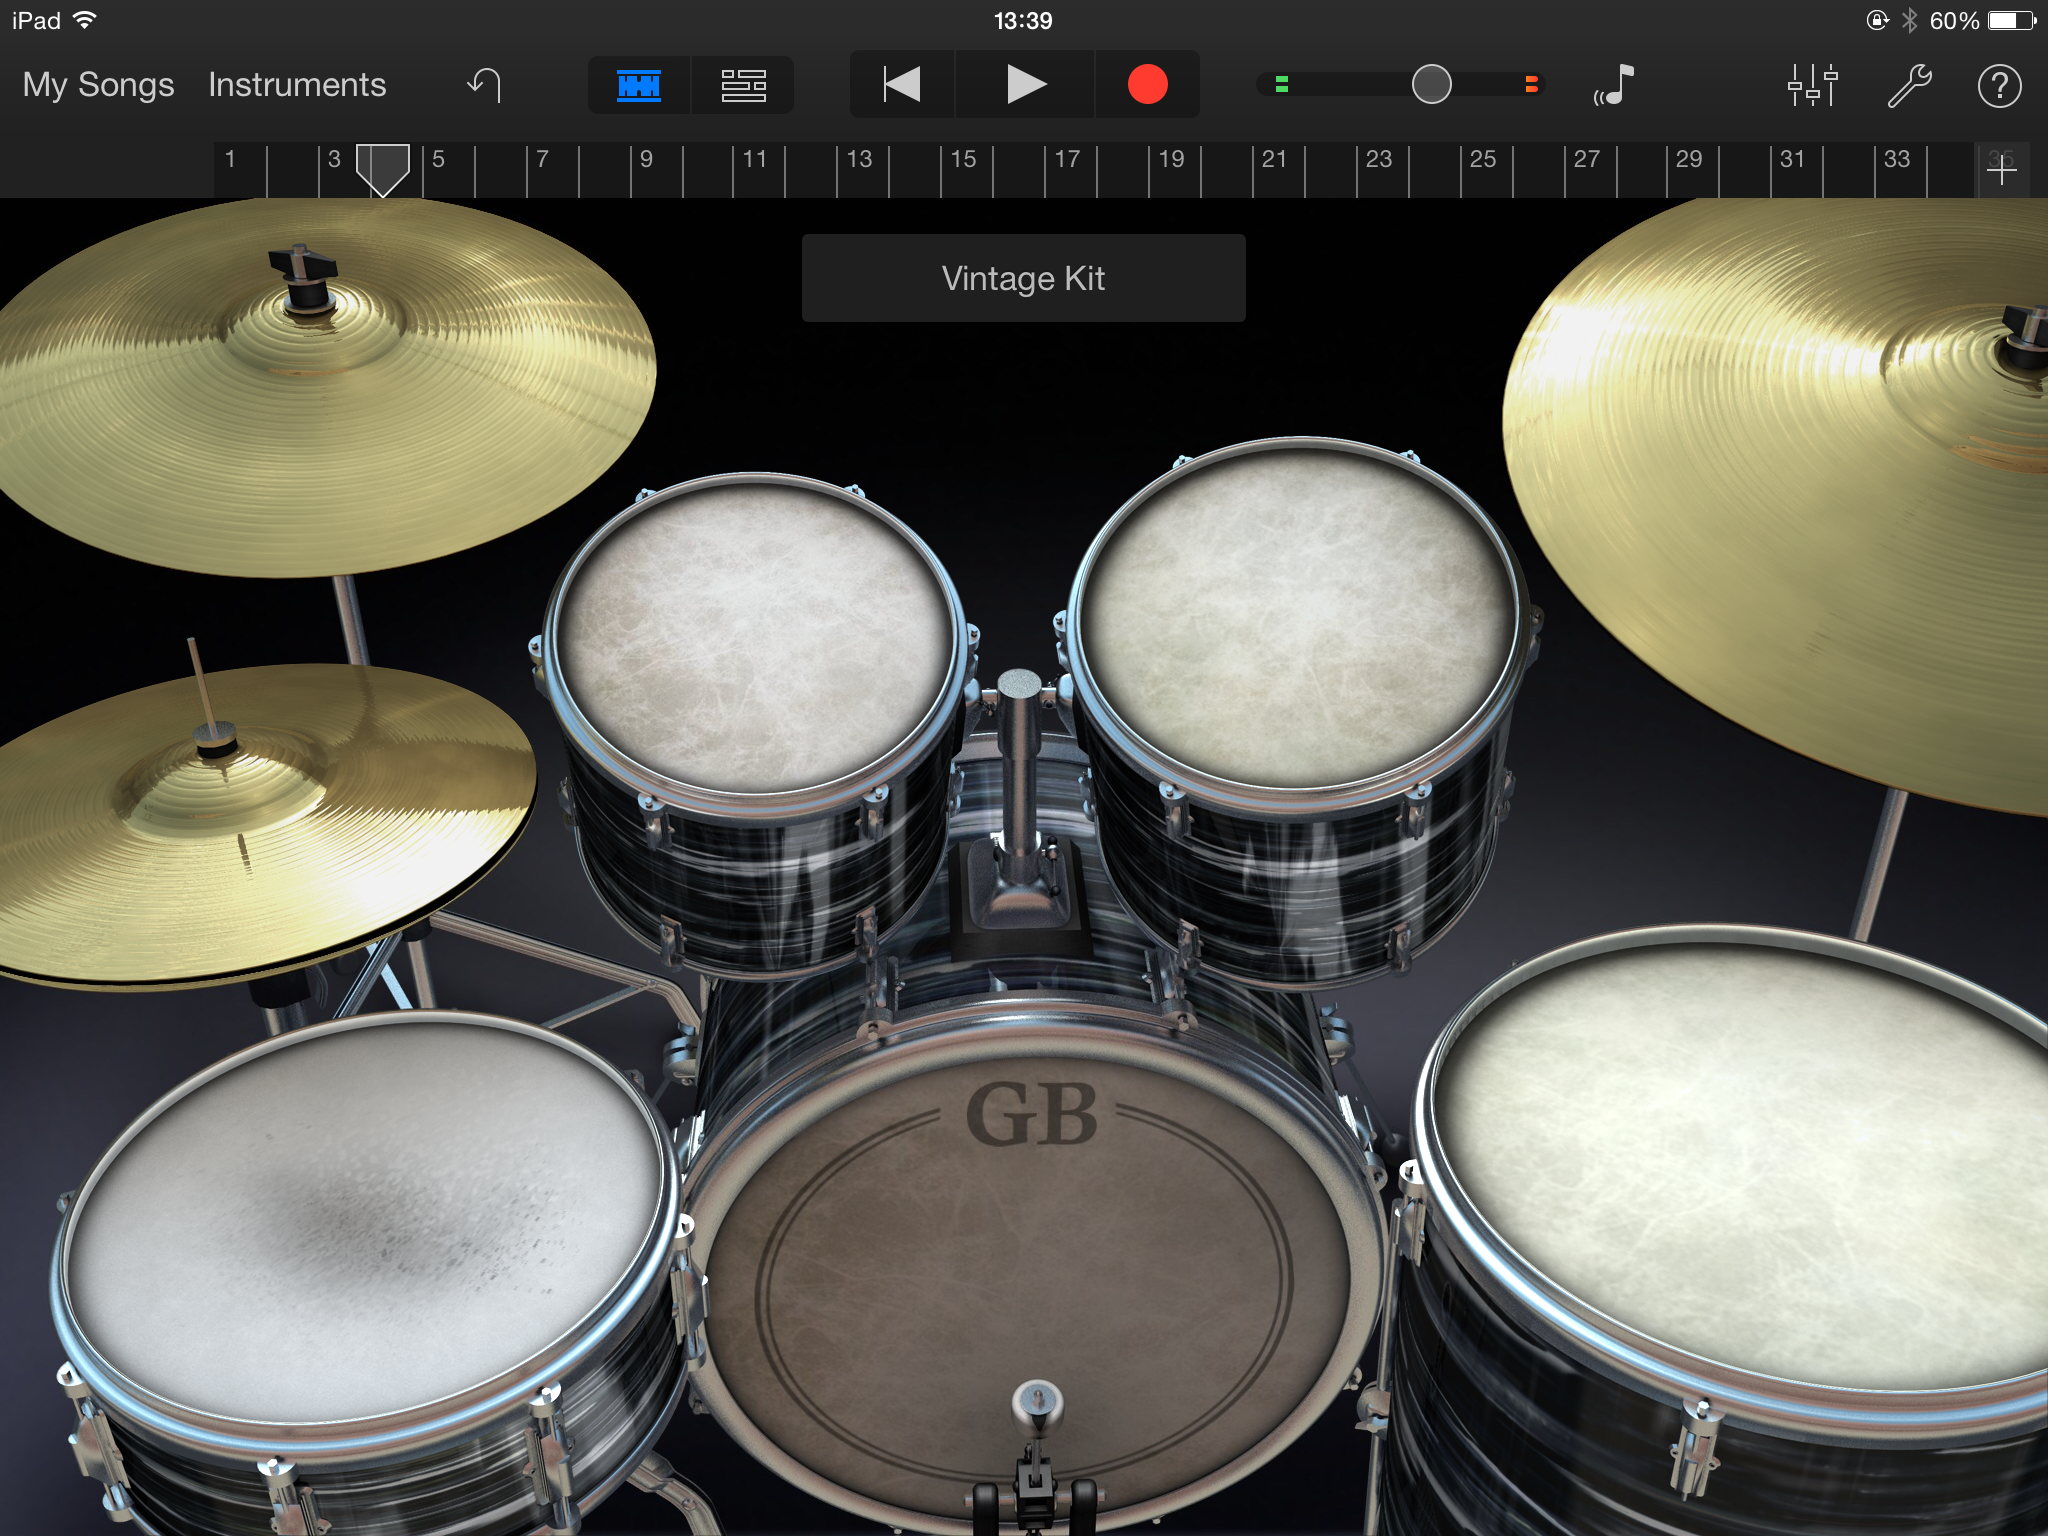
Drums
This instrument is simpler. You can see a drum kit, and all you have to do is hit it. It takes a fair amount of coordination and practice to play conventional drum patterns, but there’s lots of fun to be had channelling Animal from The Muppets and just going nuts. If you’re ready for a little refinement, try hitting different parts of the snare drum to hear its various sounds. The same works for the hi hat and ride cymbals. There’s a choice of three acoustic kits, plus three vintage drum machines.
When you come to record, it’s worth thinking about whether you want GarageBand to correct the timing of your performance – this is true for any instrument where you’re performing on the touchscreen. By default, the app shifts each note so it’s locked to a grid of 1/16th notes, which means a bar divided into 16 subdivisions. However, you may want to lock to a different grid, or keep the timing of the original performance. To do so, tap the Instrument Settings button (an icon resembling three sliders), followed by Quantisation, and choose a grid resolution or select None. This setting isn’t applied permanently, so you can go back at any time to adjust the Quantisation setting for a particular instrument.
Smart Guitar
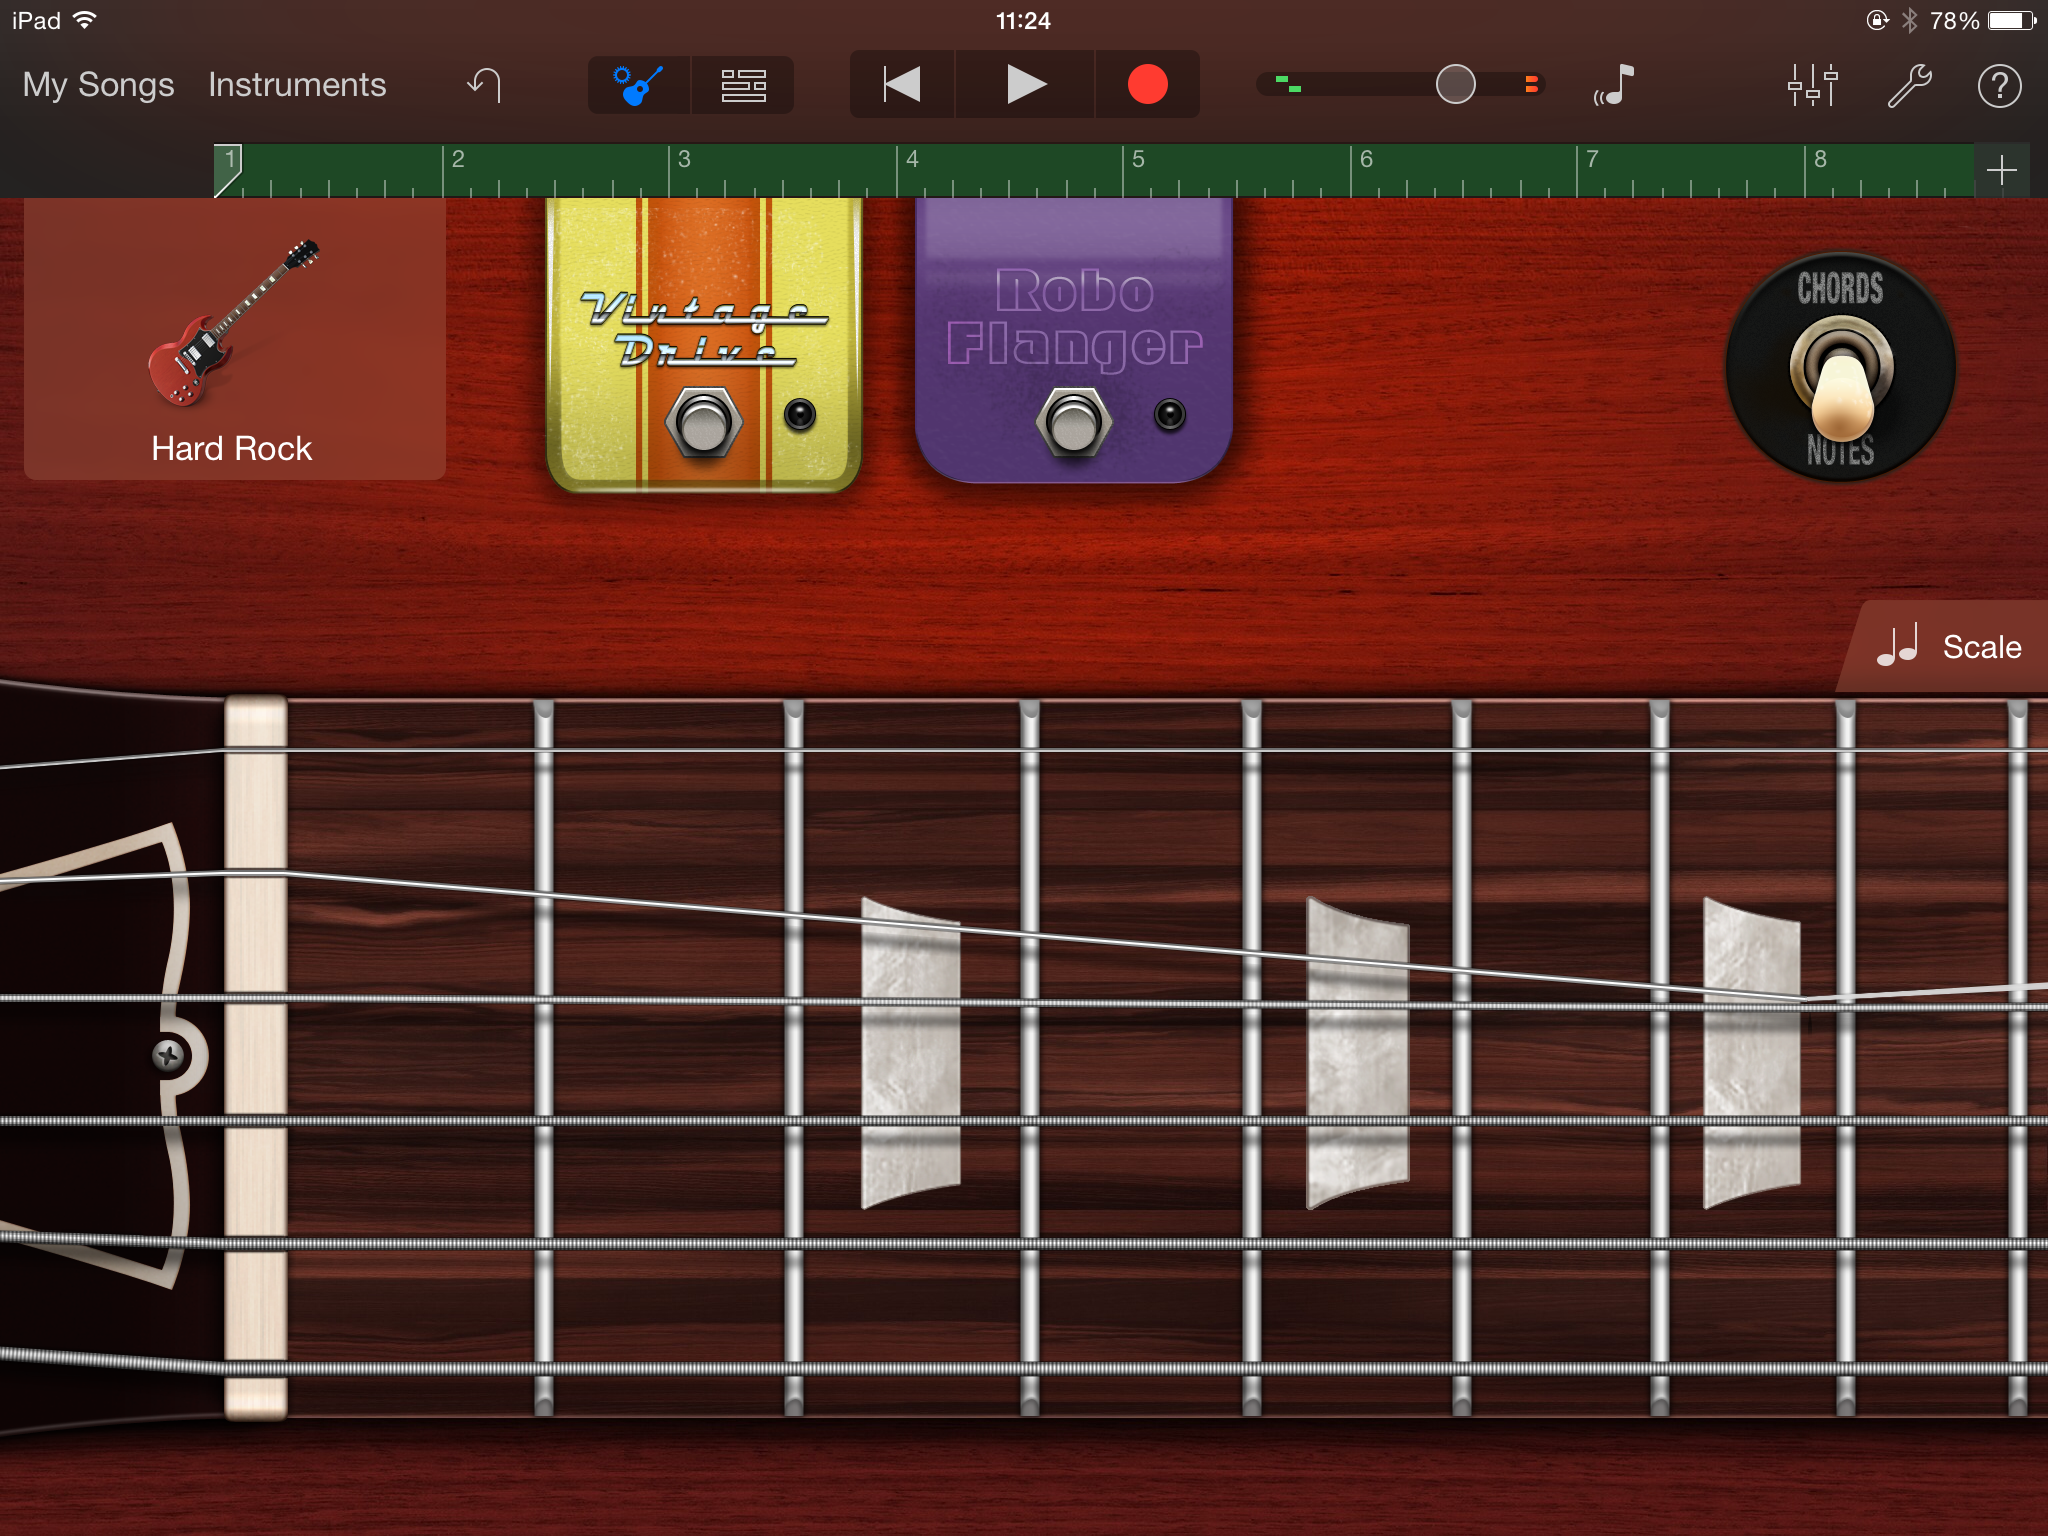
Smart Guitar showcases some of GarageBand’s best tricks. There are four guitar types to choose from, and three ways to perform with it. The default is Chords mode, where the fretboard is split up into eight chords. You can then tap individual strings, swipe a finger to play the chord or pick out arpeggios by tapping rhythmically across the strings.
Turn the Autoplay dial from Off to one of the four numbered positions and the strings will disappear, leaving just the eight chords. Now the app will play the individual strings for you, leaving you just to pick the chords. Each guitar type has its own set of phrases, but you can mix them up by recording using one guitar type and then switching to another for playback.
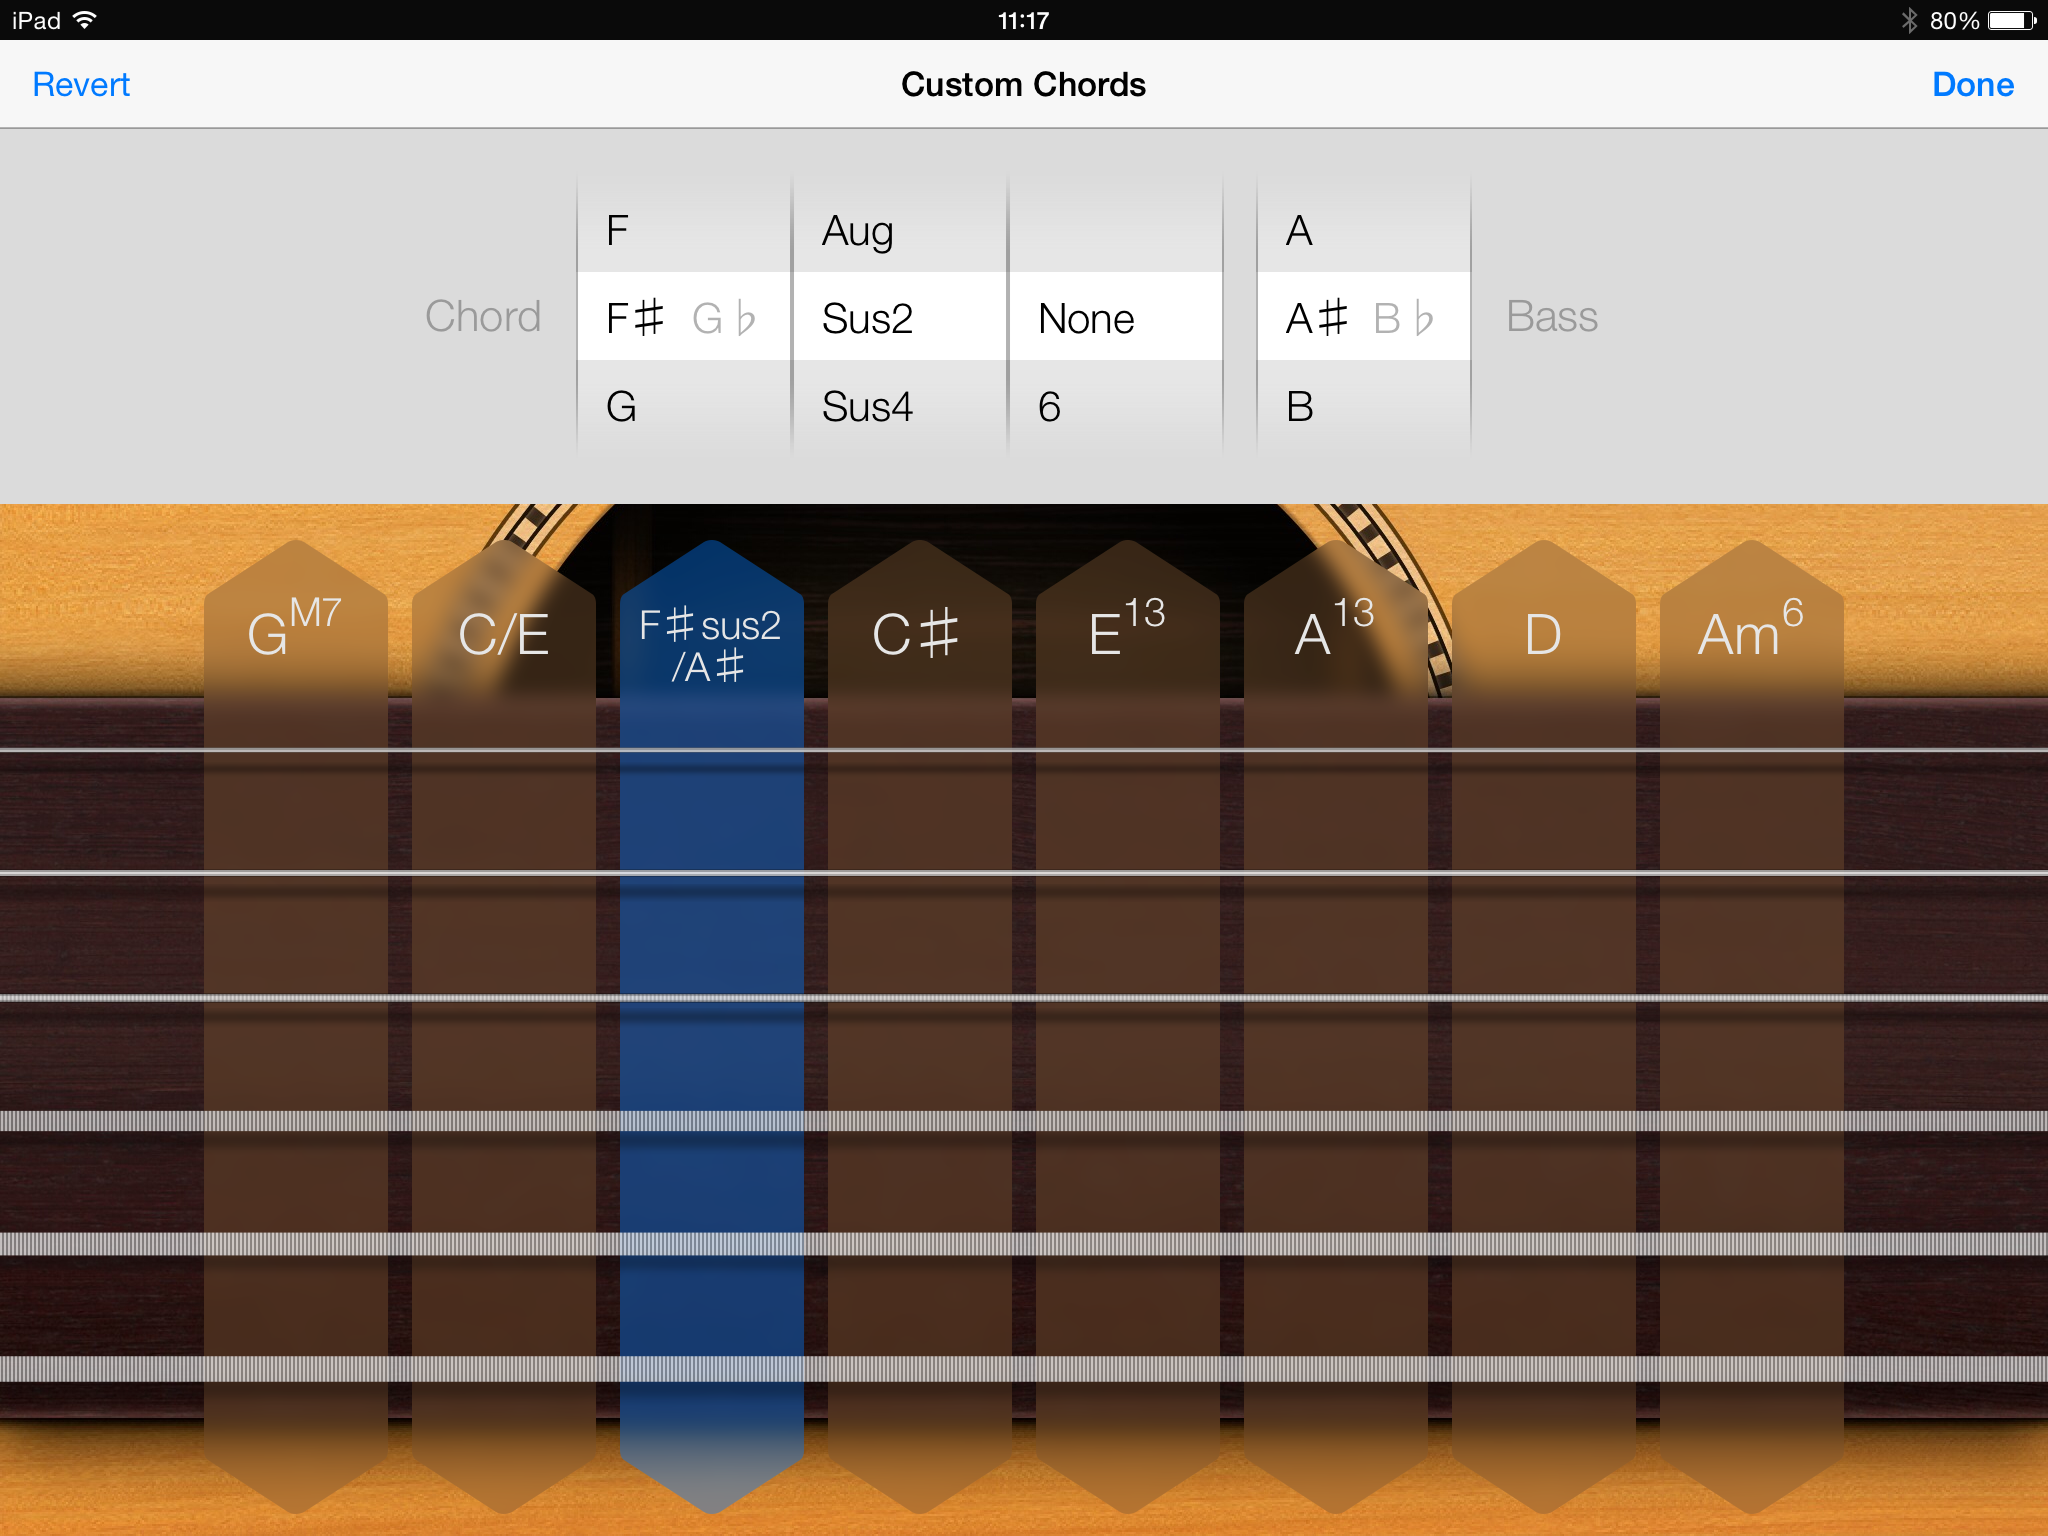
Of the eight chords shown, the fifth one from the left will be the Key that you set in the Settings menu, while the others are related chords that work well in that key. If you know a bit of music theory you might want to change these chords, which is done via the Settings menu – an Edit Chords button will appear when a suitable instrument is selected. You can specify some complex chords, such as diminished, augmented and Sus4, and change the bass note. This can really lift the harmonic landscape beyond plain old major and minor. Note that the Autoplay modes only have limited support for these more complex chord types. To hear them in full you’ll need to turn Autoplay off and strum the strings yourself.
The third mode in Smart Guitar is Notes, which gives you a conventional fretboard to play with. While the other modes are ideal for rhythm guitar parts, this is the place to perform solos. You can bend strings and perform vibrato by wobbling a finger on a fret. If you’re struggling to the right notes, hit the scale button and specify the scale of your composition (usually major or minor). This will hide all the notes that aren’t in that scale.
Smart Bass
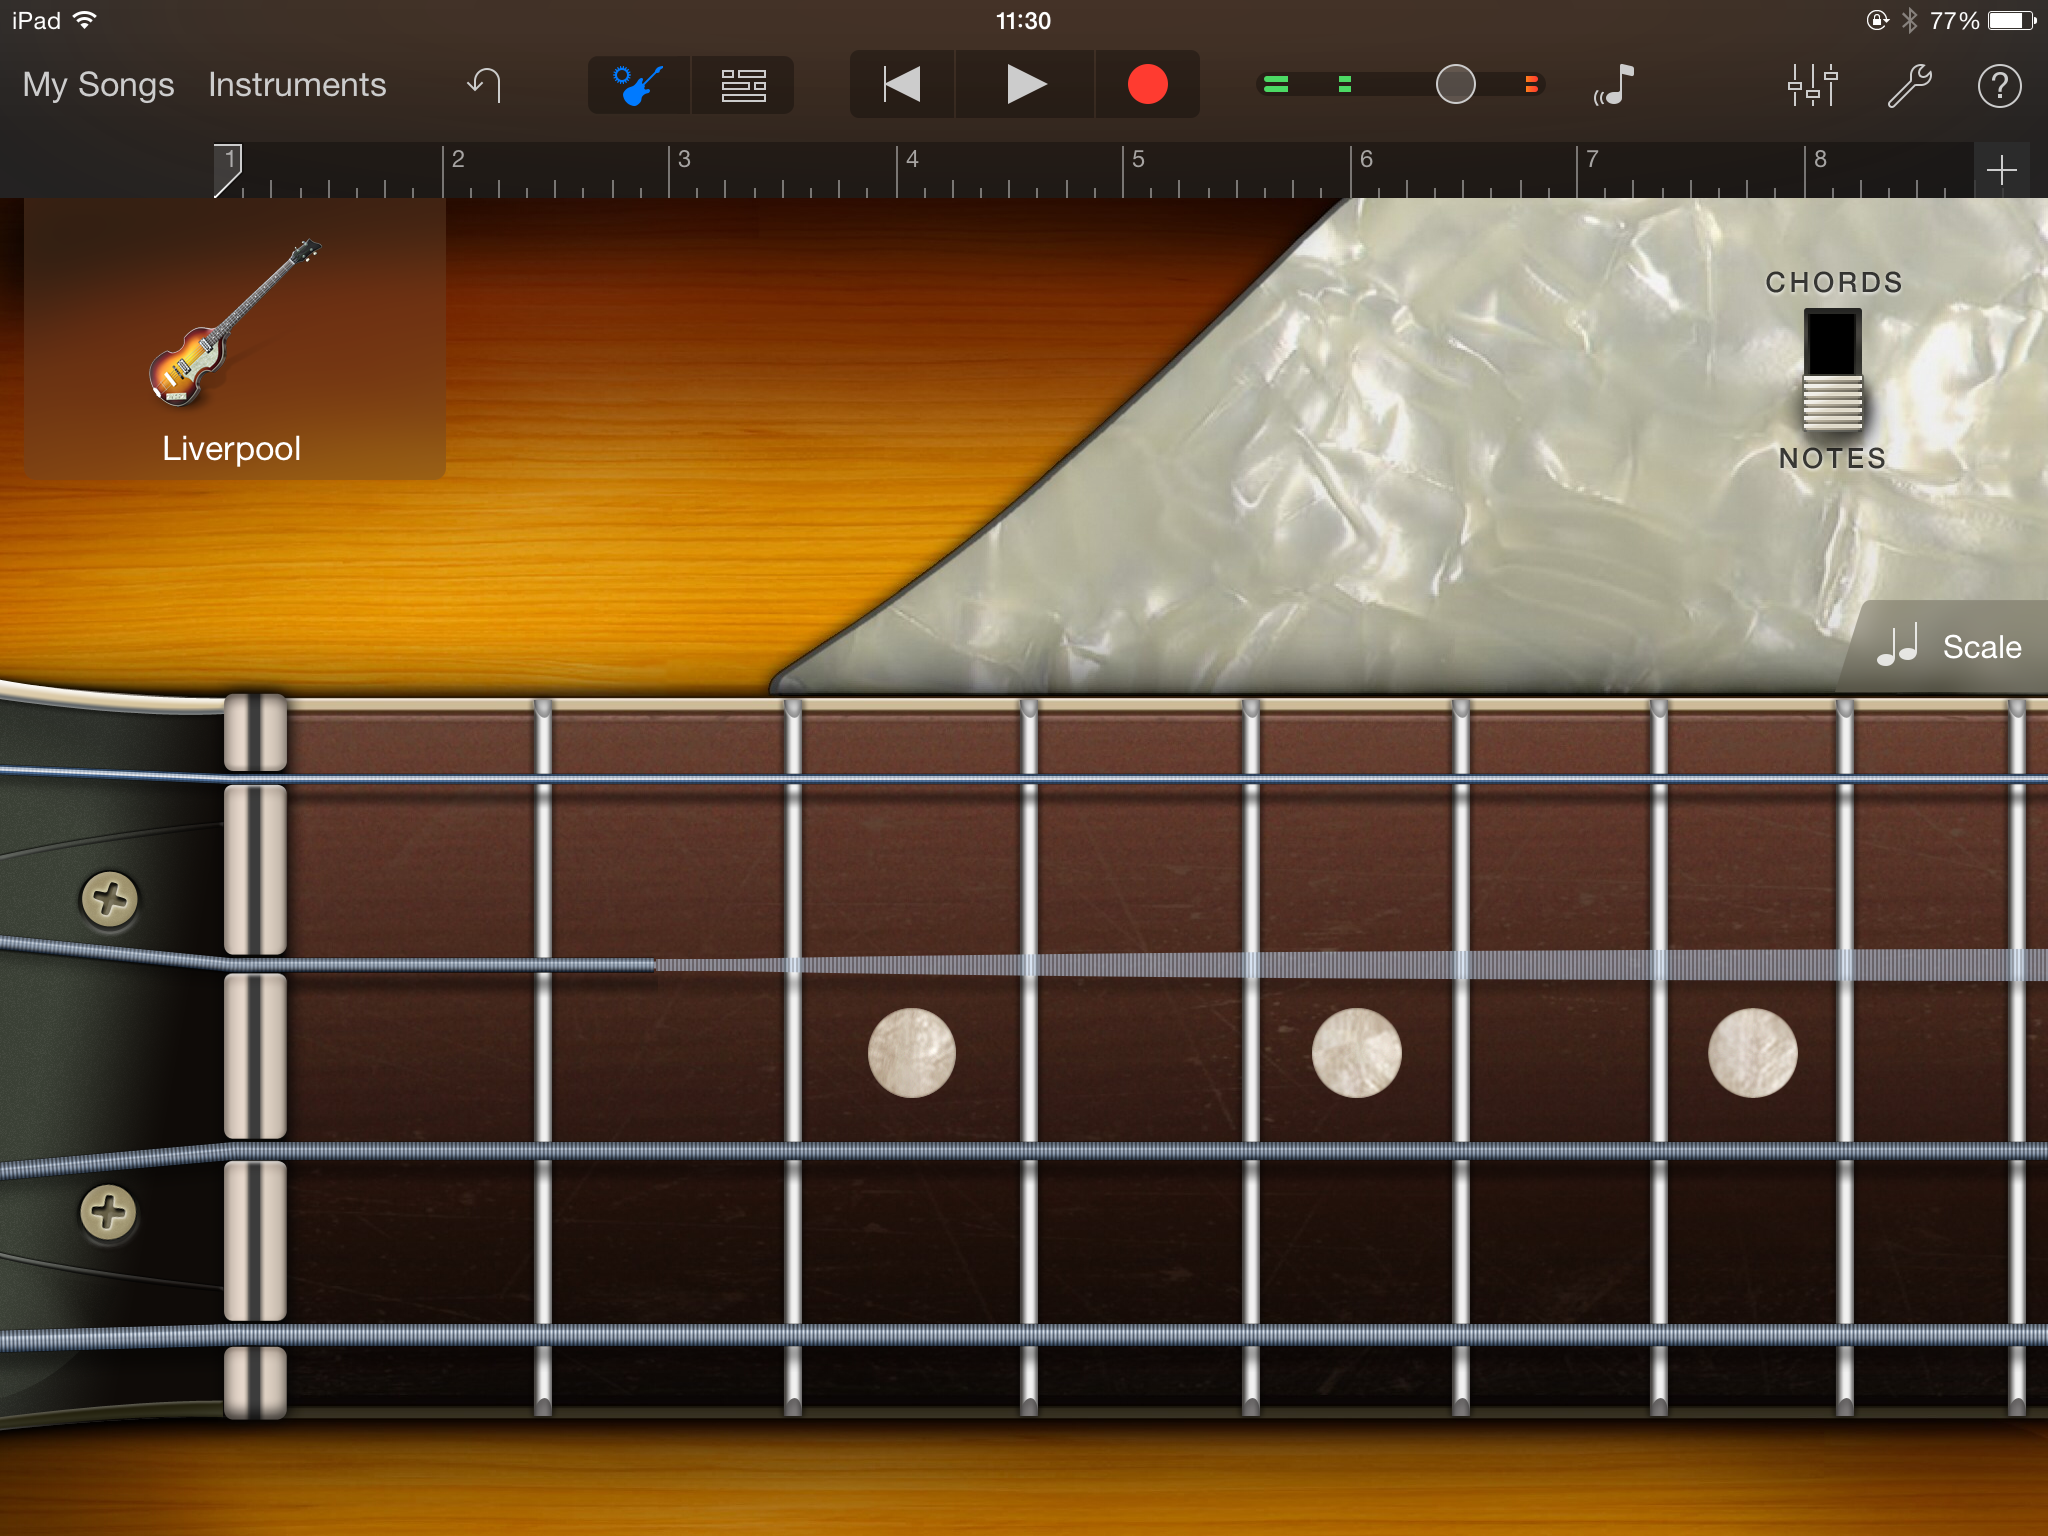
Smart Bass is almost identical to Smart Guitar, except for having a different set of sounds and Autoplay phrases, and having four rather than six strings. It’s worth noting that the upright bass can perform sliding notes by running a finger along its fretless fingerboard. The app isn’t entirely authentic, though, as it jumps to the nearest note when you first tap on the fingerboard.
Smart Strings
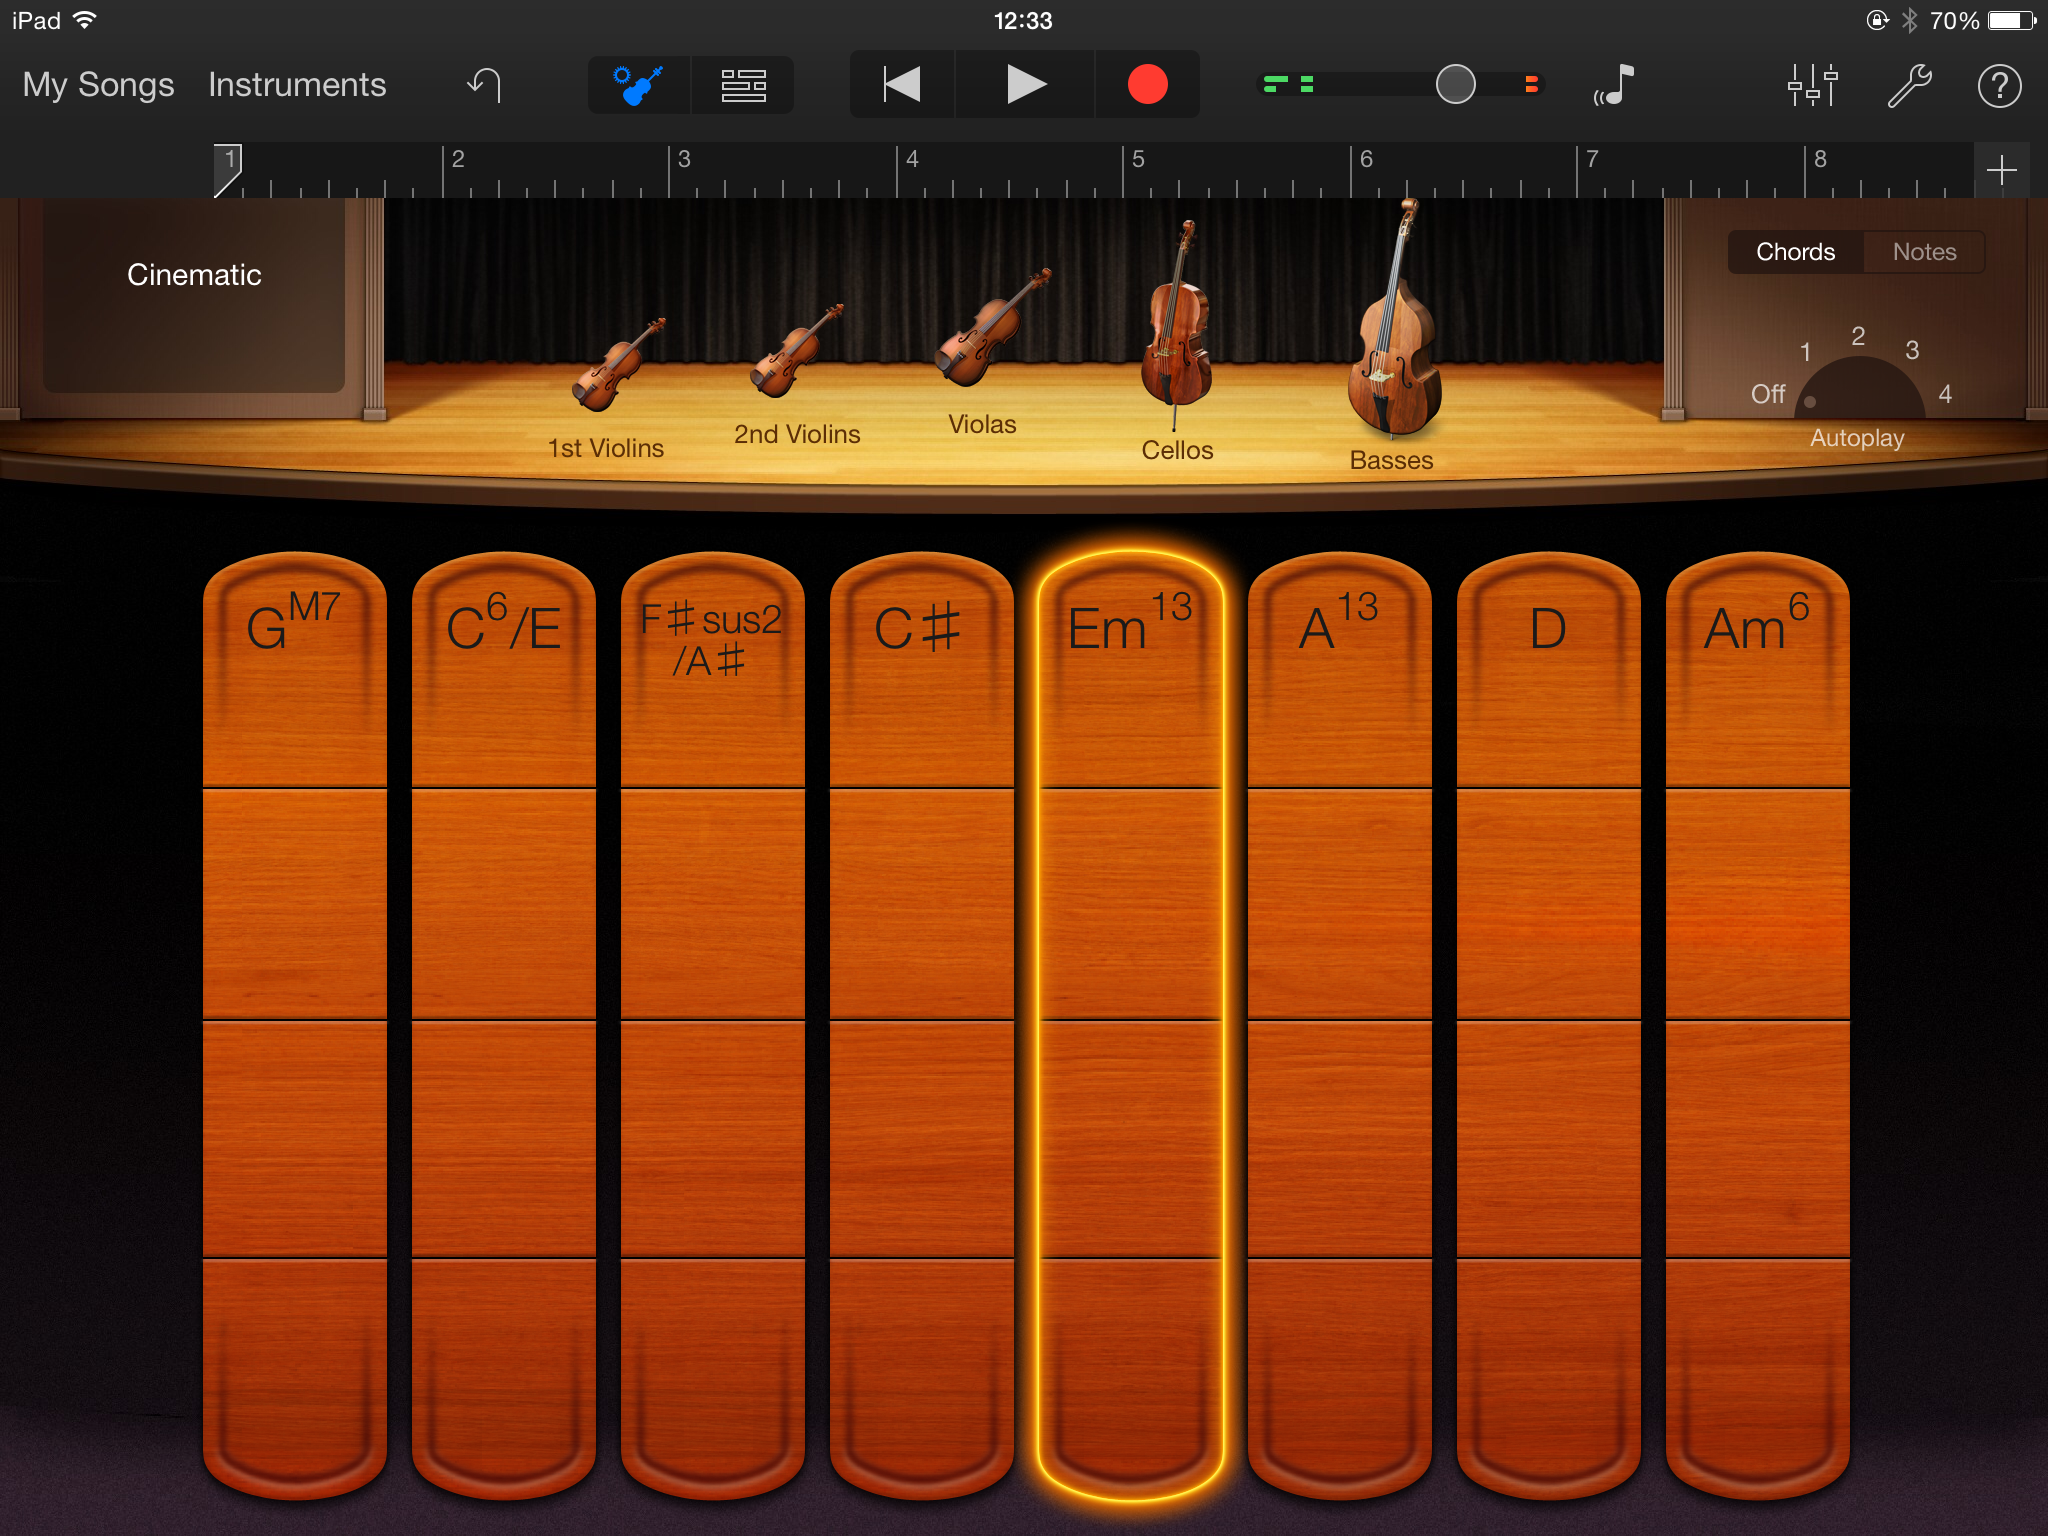
This leads us onto Smart Strings, which is our favourite instrument in the app. In Notes mode there’s a choice of bass, cello, viola or violin, and each one shows a virtual fingerboard that allows notes to glide up and down in pitch – perfect for suspenseful cinematic glissandi, or for adding some vibrato to a performance.
Hold down the brass-coloured button, just under the strings on the left, to unlock extra performance techniques. Tapping a string performs a pizzicato note, while a short sideways poke performs a staccato bowed note. Gentler, persistent movement plays a legato note, which you can make louder or quieter by varying the speed of movement.
The same three playing styles are also available in Chords mode, as long as the Autoplay function is disabled. Chords mode works in conjunction with the same set of chords that appeared in Smart Guitar, including any custom chords you defined. However, rather than strum strings, chords are divided into four areas, each of which produces a different voicing of the chord. Poking and jabbing at these controls can produce some fantastically realistic and evocative string arrangements.
If you prefer for the app to generate musical phrases for you, turn to one of the Autoplay settings and tap a chord. You can access additional phrases by tapping the word Cinematic and trying the other styles available.
Smart Keyboard

Smart Keyboard works along similar lines, although it doesn’t have a separate Notes mode as the Keyboard instrument has that covered. It includes the same arpeggiator and sustain functions, and being able to apply these to some pre-defined chords is a lot easier than the trying to pick out notes on a normal keyboard.
Another great feature is the ability to control the virtual left hand (for low notes) and right hand (for higher notes) separately. This works particularly well for the Autoplay phrases. A popular trick in pop music is to use the same phrase repeated in the higher notes but change the bass note to give each iteration a different colour. Conversely, you could try changing the chord of the upper notes but keep the lower notes stuck in the root key. If the virtual left and right hands do move together, try staggering when they change so there’s a bit of push and pull to the chord sequence. All of these techniques can breathe life into an otherwise formulaic chord sequence, taking it beyond what’s normally possible with auto-accompaniment features.
Smart Drums
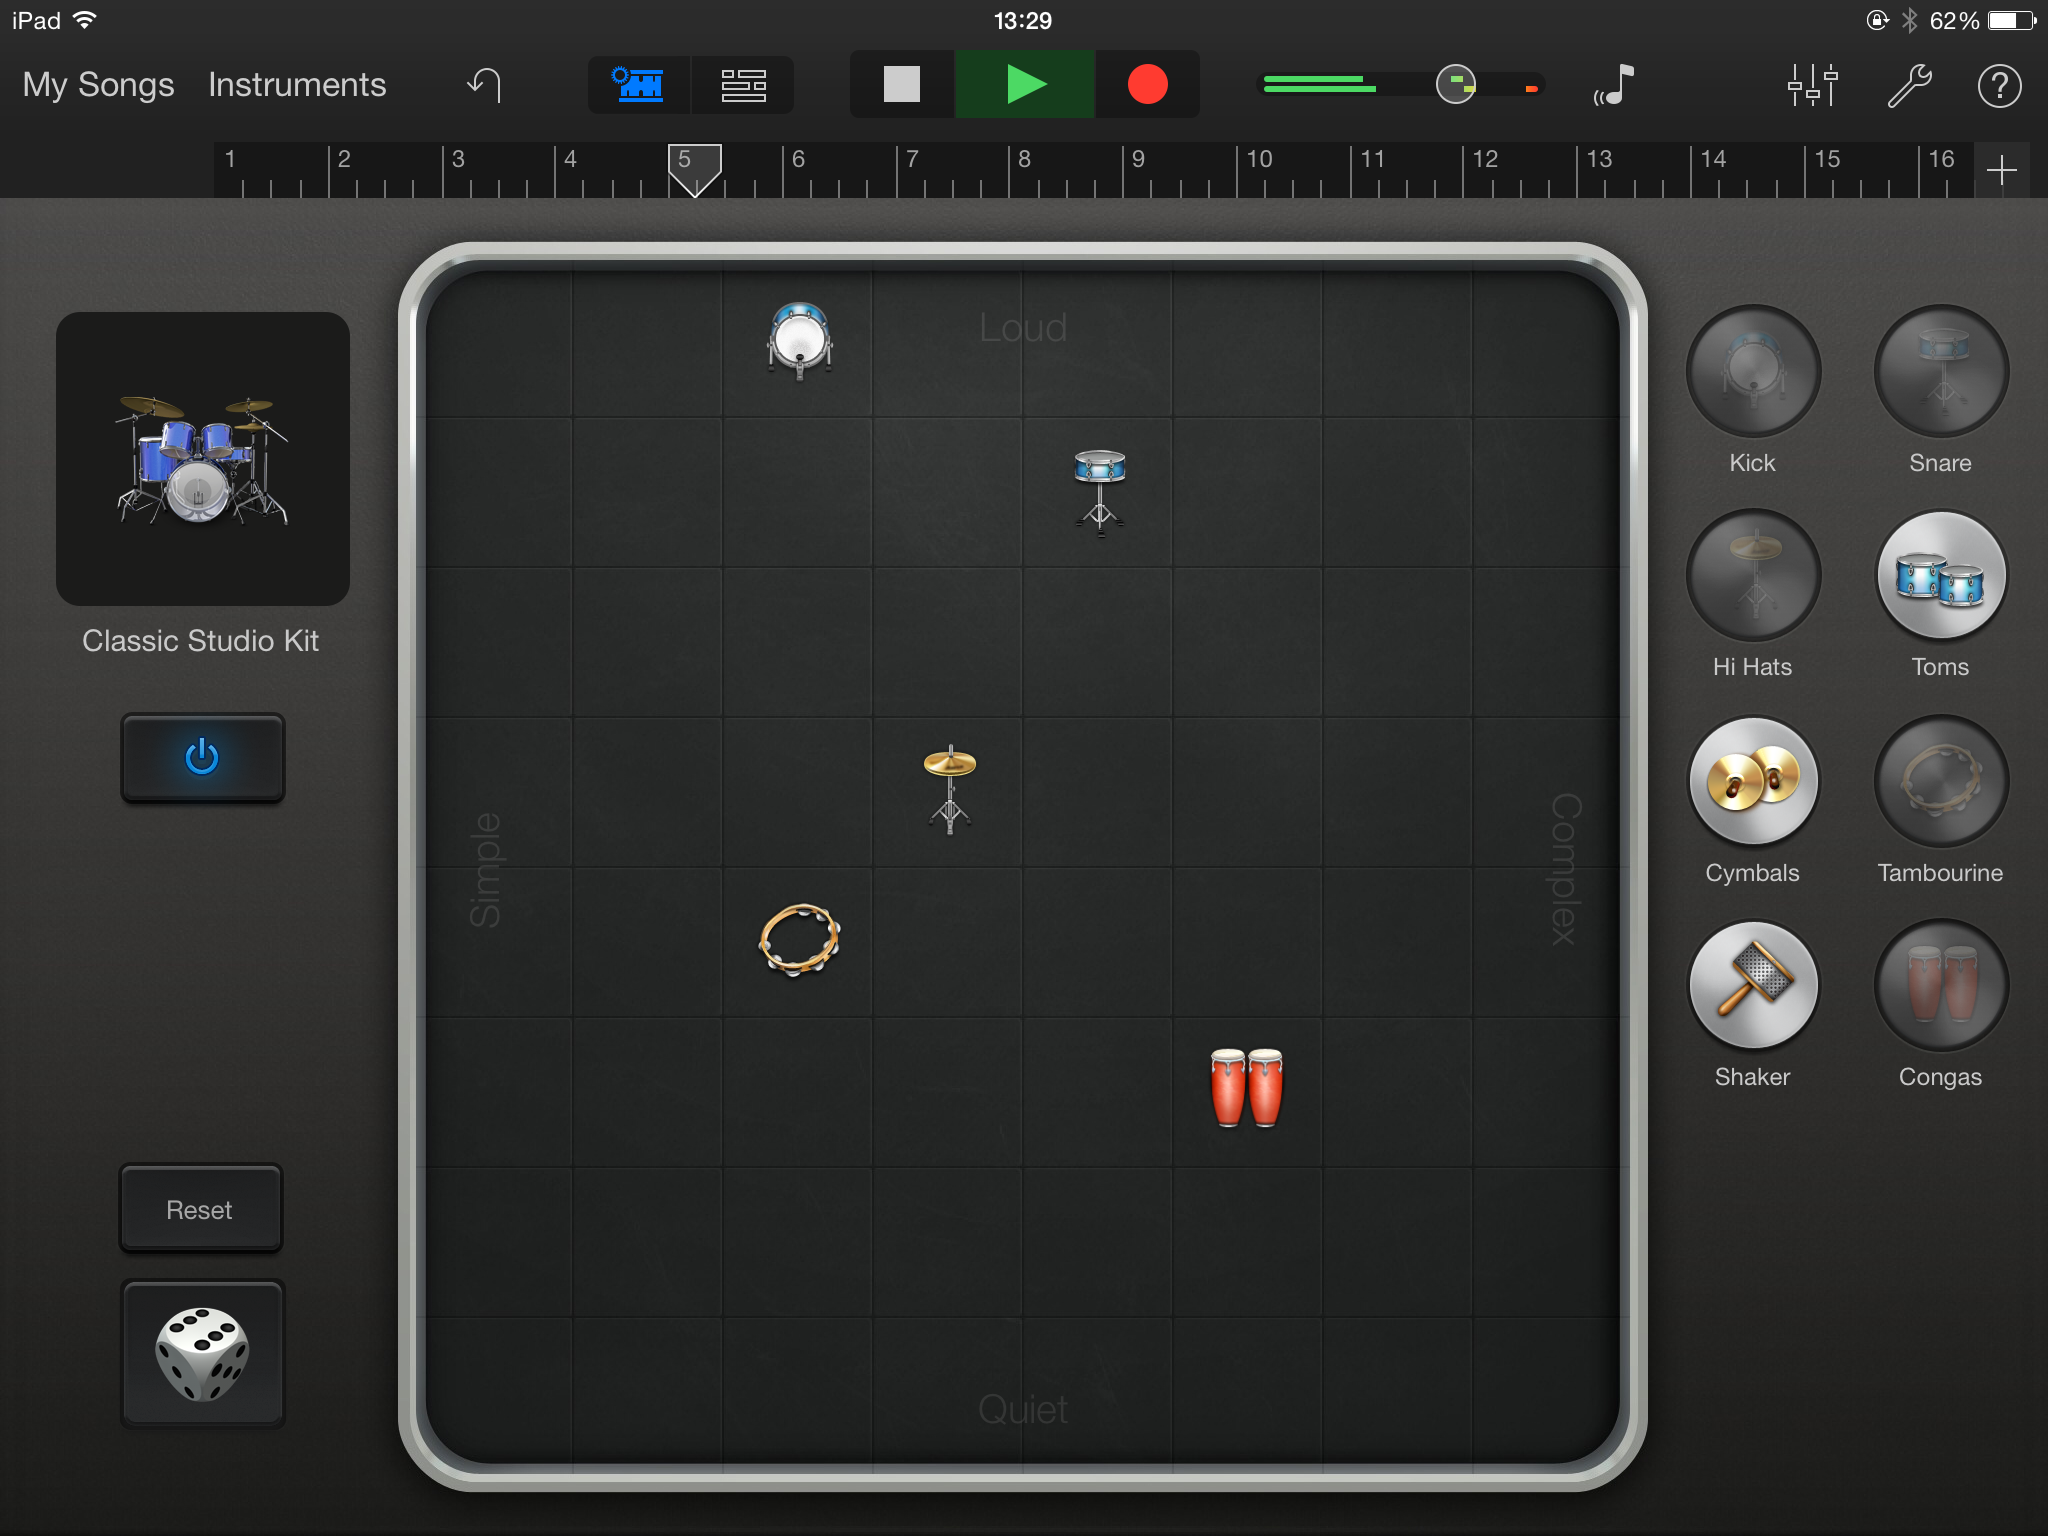
If your fingers tire of stabbing away at the Drums instrument, Smart Drums should provide some relief. It creates drum performances for you, based on a grid with volume on the vertical axis and complexity on the horizontal. The various components of a drum kit can be placed anywhere on the grid, and you can create variations in the performance by recording movement to their grid position. There’s the same choice of three acoustic and three electronic drum kits as in the Drums instrument.
Audio Recorder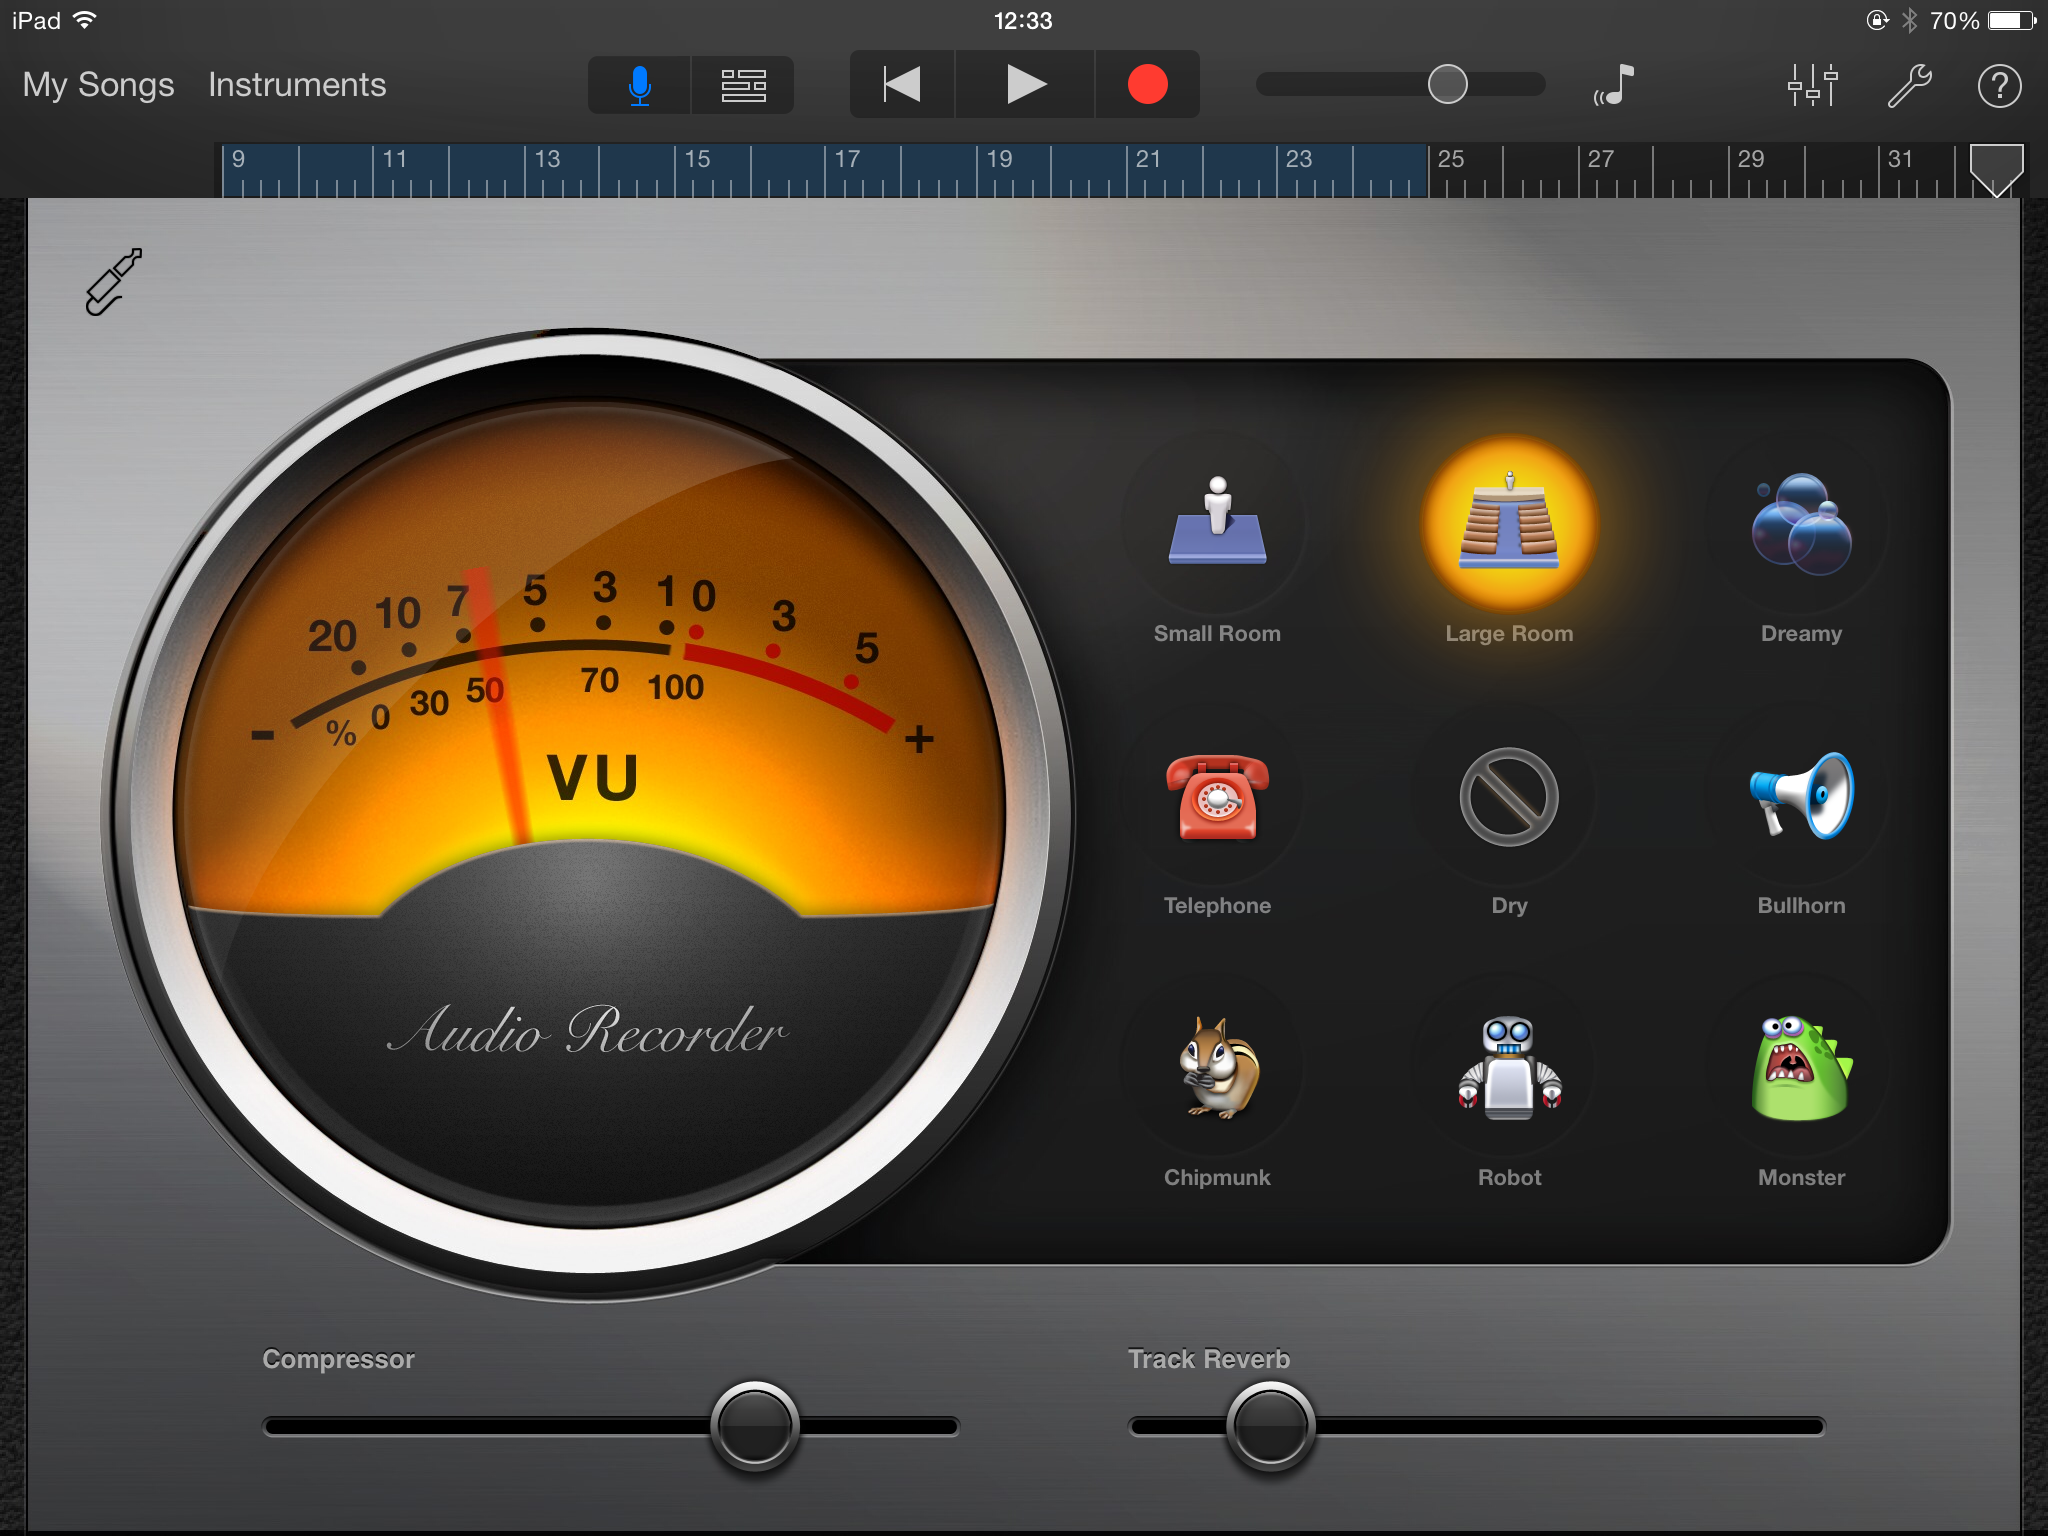
All of the above are virtual instruments where the app generates the sounds. Audio Recorder lets you capture the sound of a real instrument or your voice. It’s best to use headphones to avoid recording the existing tracks at the same time. It’s useful to hear yourself clearly, so tap the plug icon and enable the Monitor option. Also consider enabling the Noise Gate function to cut out background noises for the sections when you’re not playing or singing. GarageBand uses the iOS device’s built in microphone by default, so you just need to position the device so the microphone is near to the source.
Once you have something recorded, try out some of the effects. There aren’t a huge number and some are fairly gimmicky, but Small Room and Large Room work well for vocals and most other instruments. The Compressor control is useful for avoiding a vocal becoming drowned out by other sounds, but it’s often necessary to turn down the volume of the recording after turning up the Compressor. To do so, tap the instrument settings (three sliders icon) and reduce the Track Volume control.
Guitar Amp
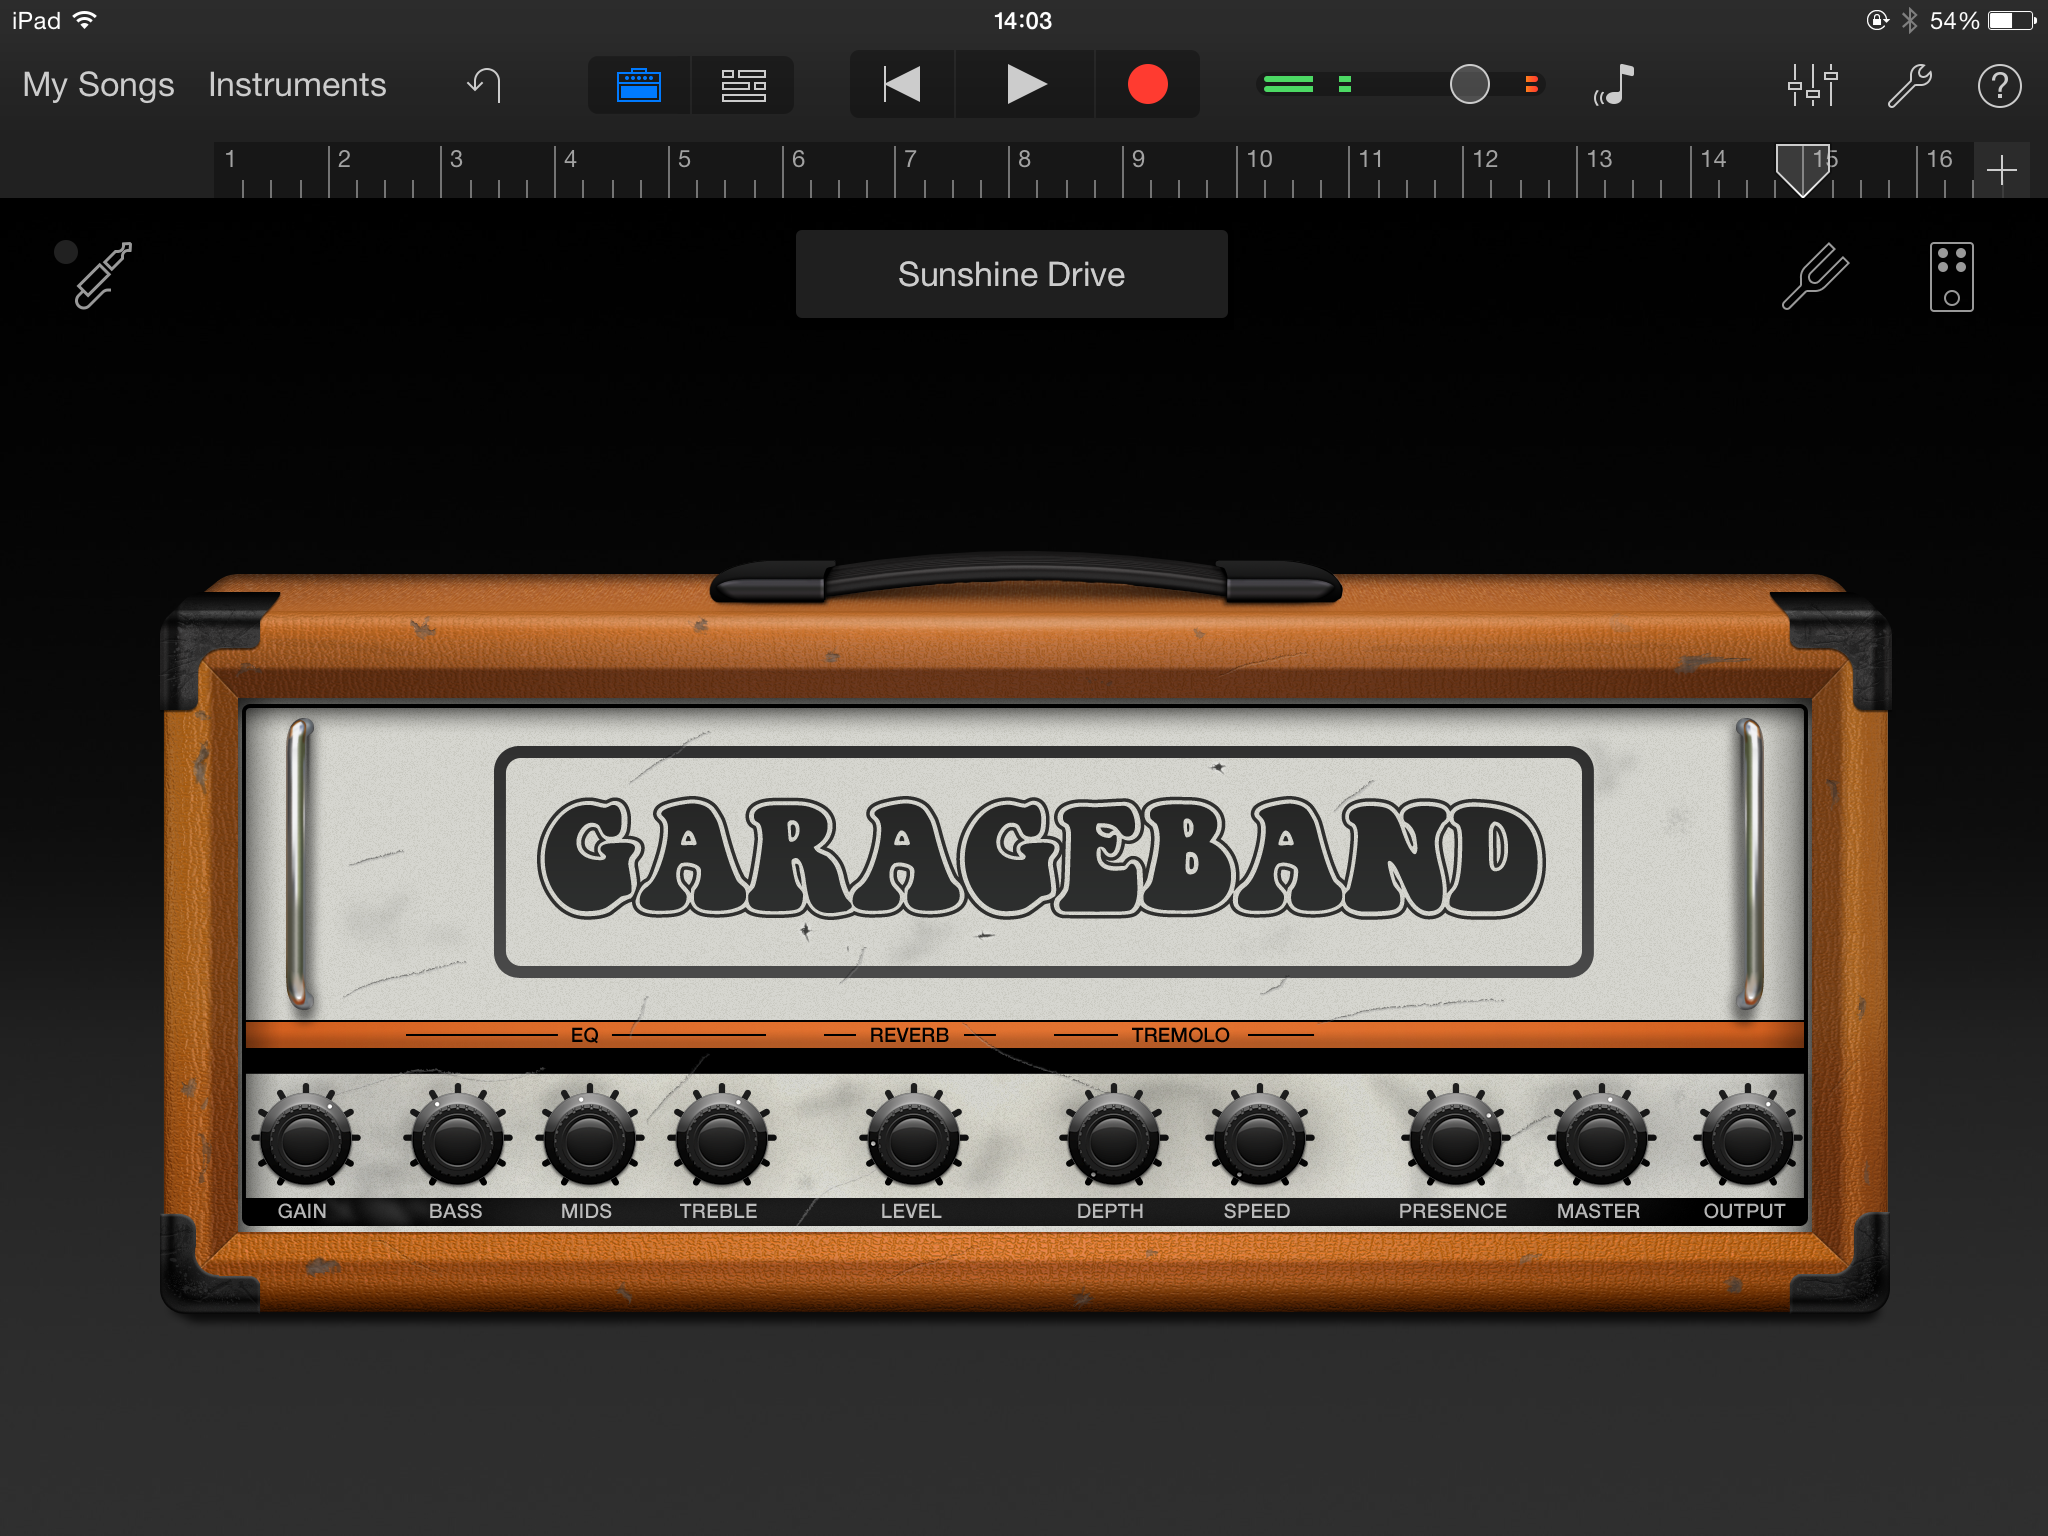
This works in a similar way to Audio Recorder, but passes the captured sound through a virtual guitar amp and effects pedals. It’s designed to be used in conjunction with the various iOS guitar interfaces that are available, such as the IK Multimedia iRig range. However, if you’re feeling adventurous there’s no reason why you can’t record any sound via the iOS device’s microphone and run it through this collection of effects. It’s also possible to drag recordings made with the Audio Recorder instrument across to a Guitar Amp track in the sequencer.
There are 32 Guitar Amp presets, grouped into Clean, Crunchy, Distorted and Processed categories. These are drawn from nine virtual amp types that bear an uncanny resemblance to amps from the likes of Fender, Marshall and Vox. Meanwhile, the ten stomp boxes cover all the usual bases, with three distortion effects, a compressor, delay, chorus, flanger, vibrato and auto-wah pedal.
Sampler
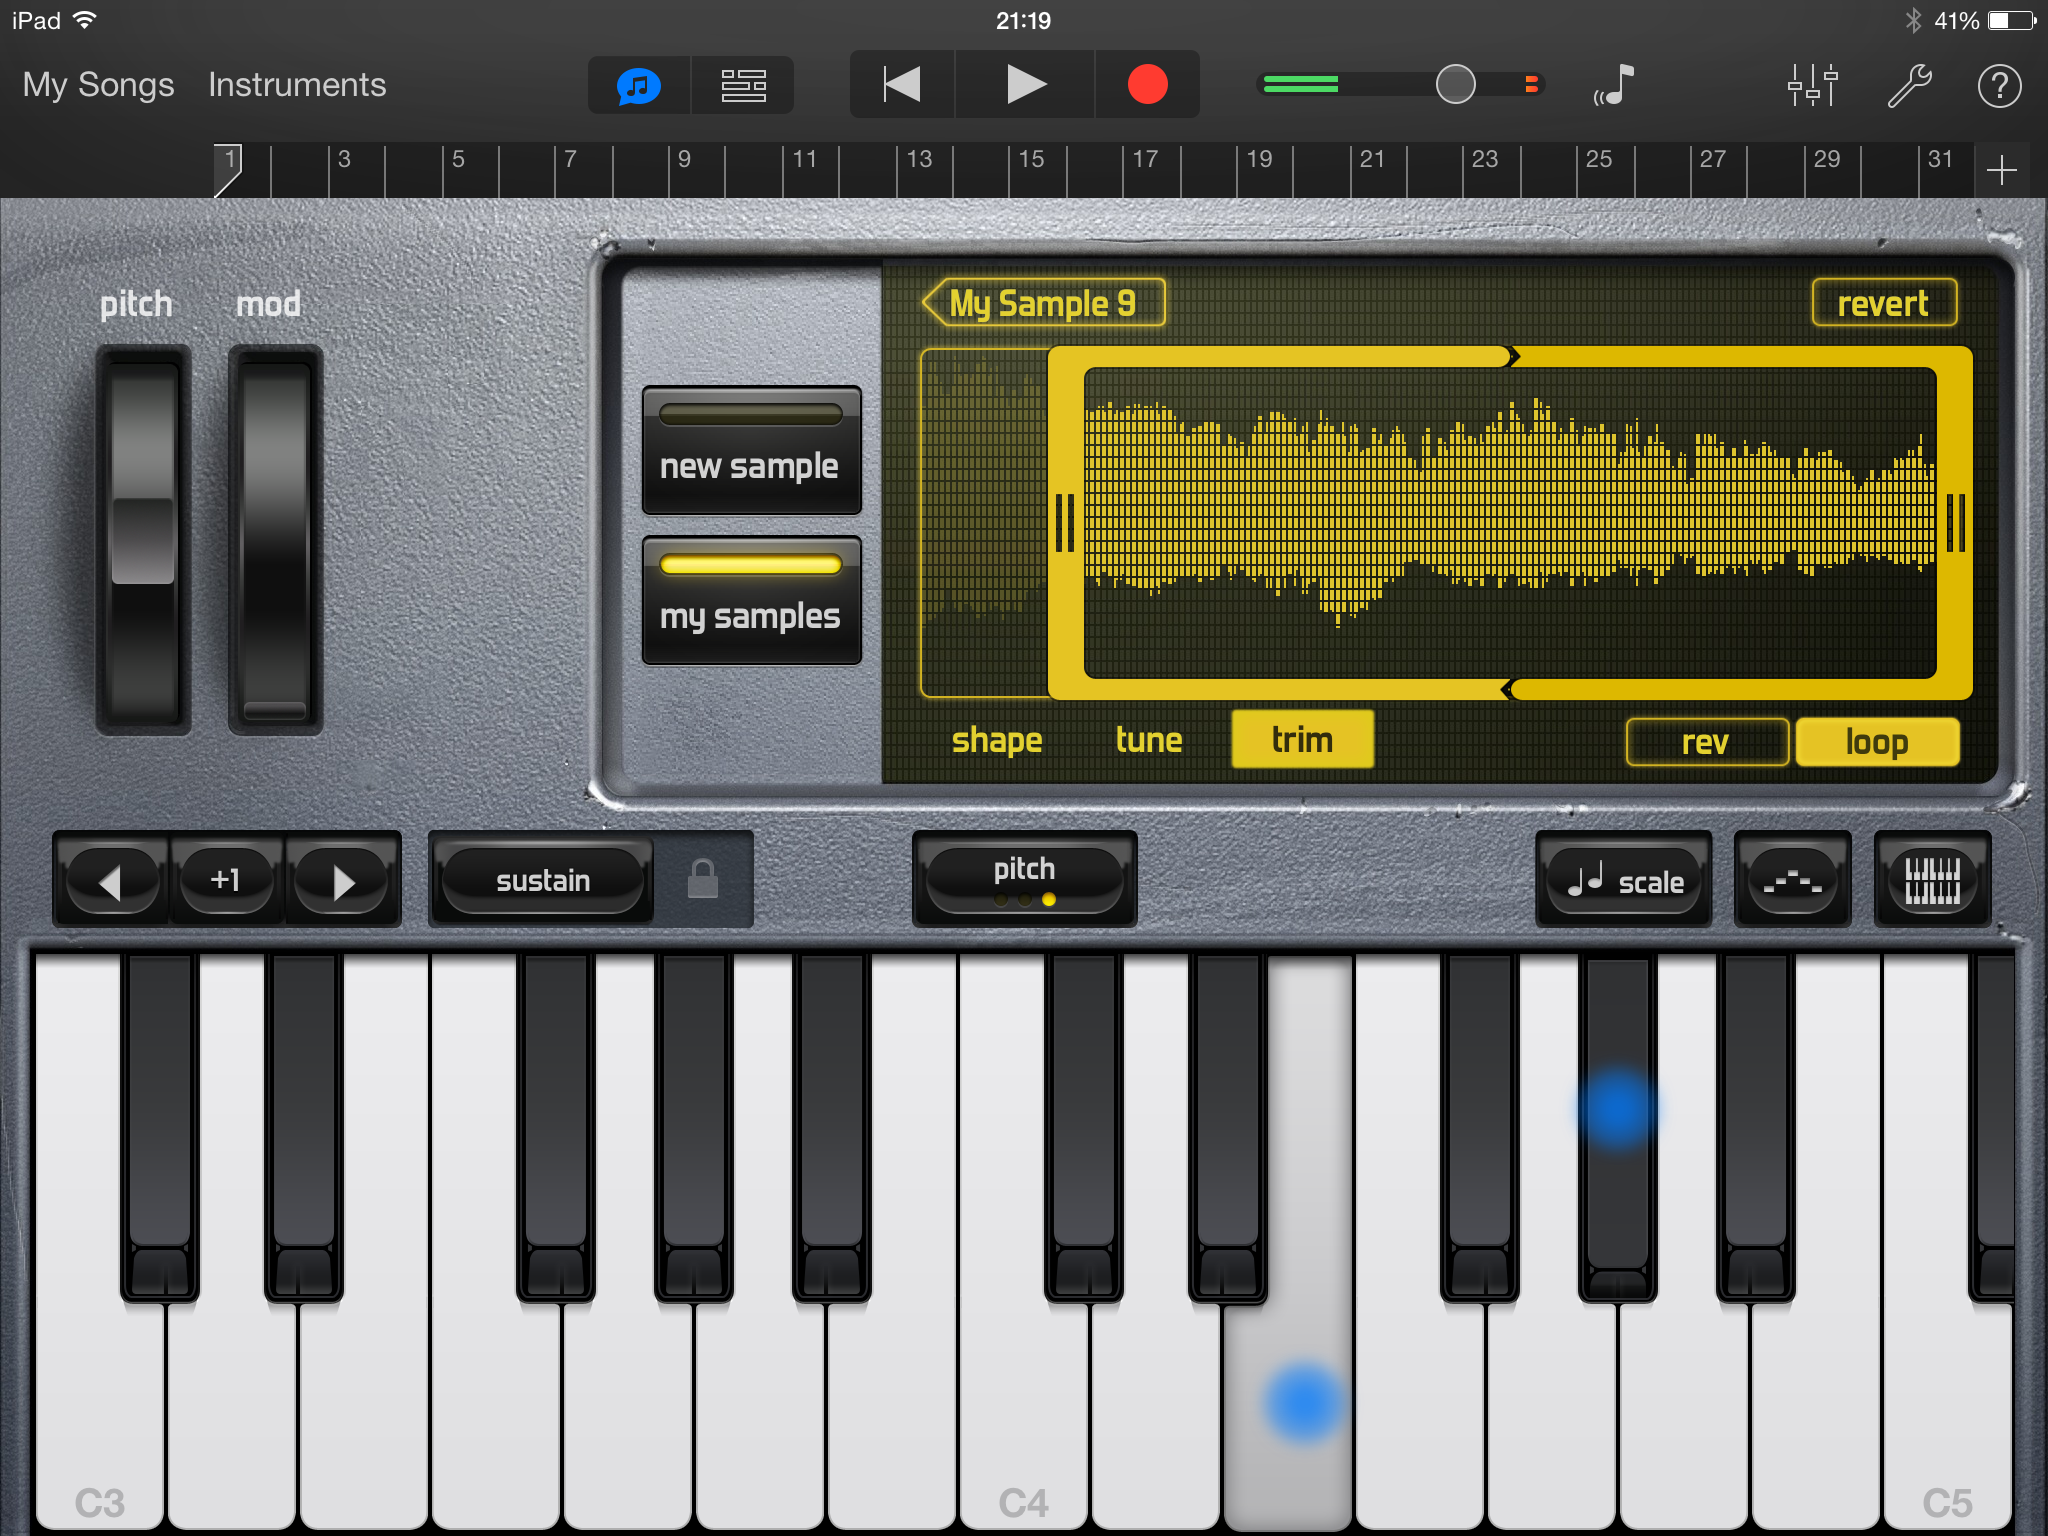
Sampling involves taking an audio recording and mapping it across a keyboard so you can perform it like an instrument. It’s the technology behind many of GarageBand’s other instruments, which are based on recordings or samples of real instruments. The Sampler lets you make your own instruments from scratch.
The first task is to record a sound. Tap the Start button and make a noise. Press Stop and you’ll immediately be able to play that noise at different pitches on the virtual keyboard. There’s lots of fun to be had from simply recording your voice. Recording something with a constant pitch will let you perform melodies on the keyboard. GarageBand will even identify the pitch automatically and map it to the correct key on the keyboard, although you can adjust this using the Tune settings.
Tap Trim to truncate the start and end points of the sample as necessary. You can also reverse the sample, or loop it so it continues for as long as you hold the keyboard key down. The Shape controls dictate how quickly each note stops and starts.
Inter-App Audio Apps
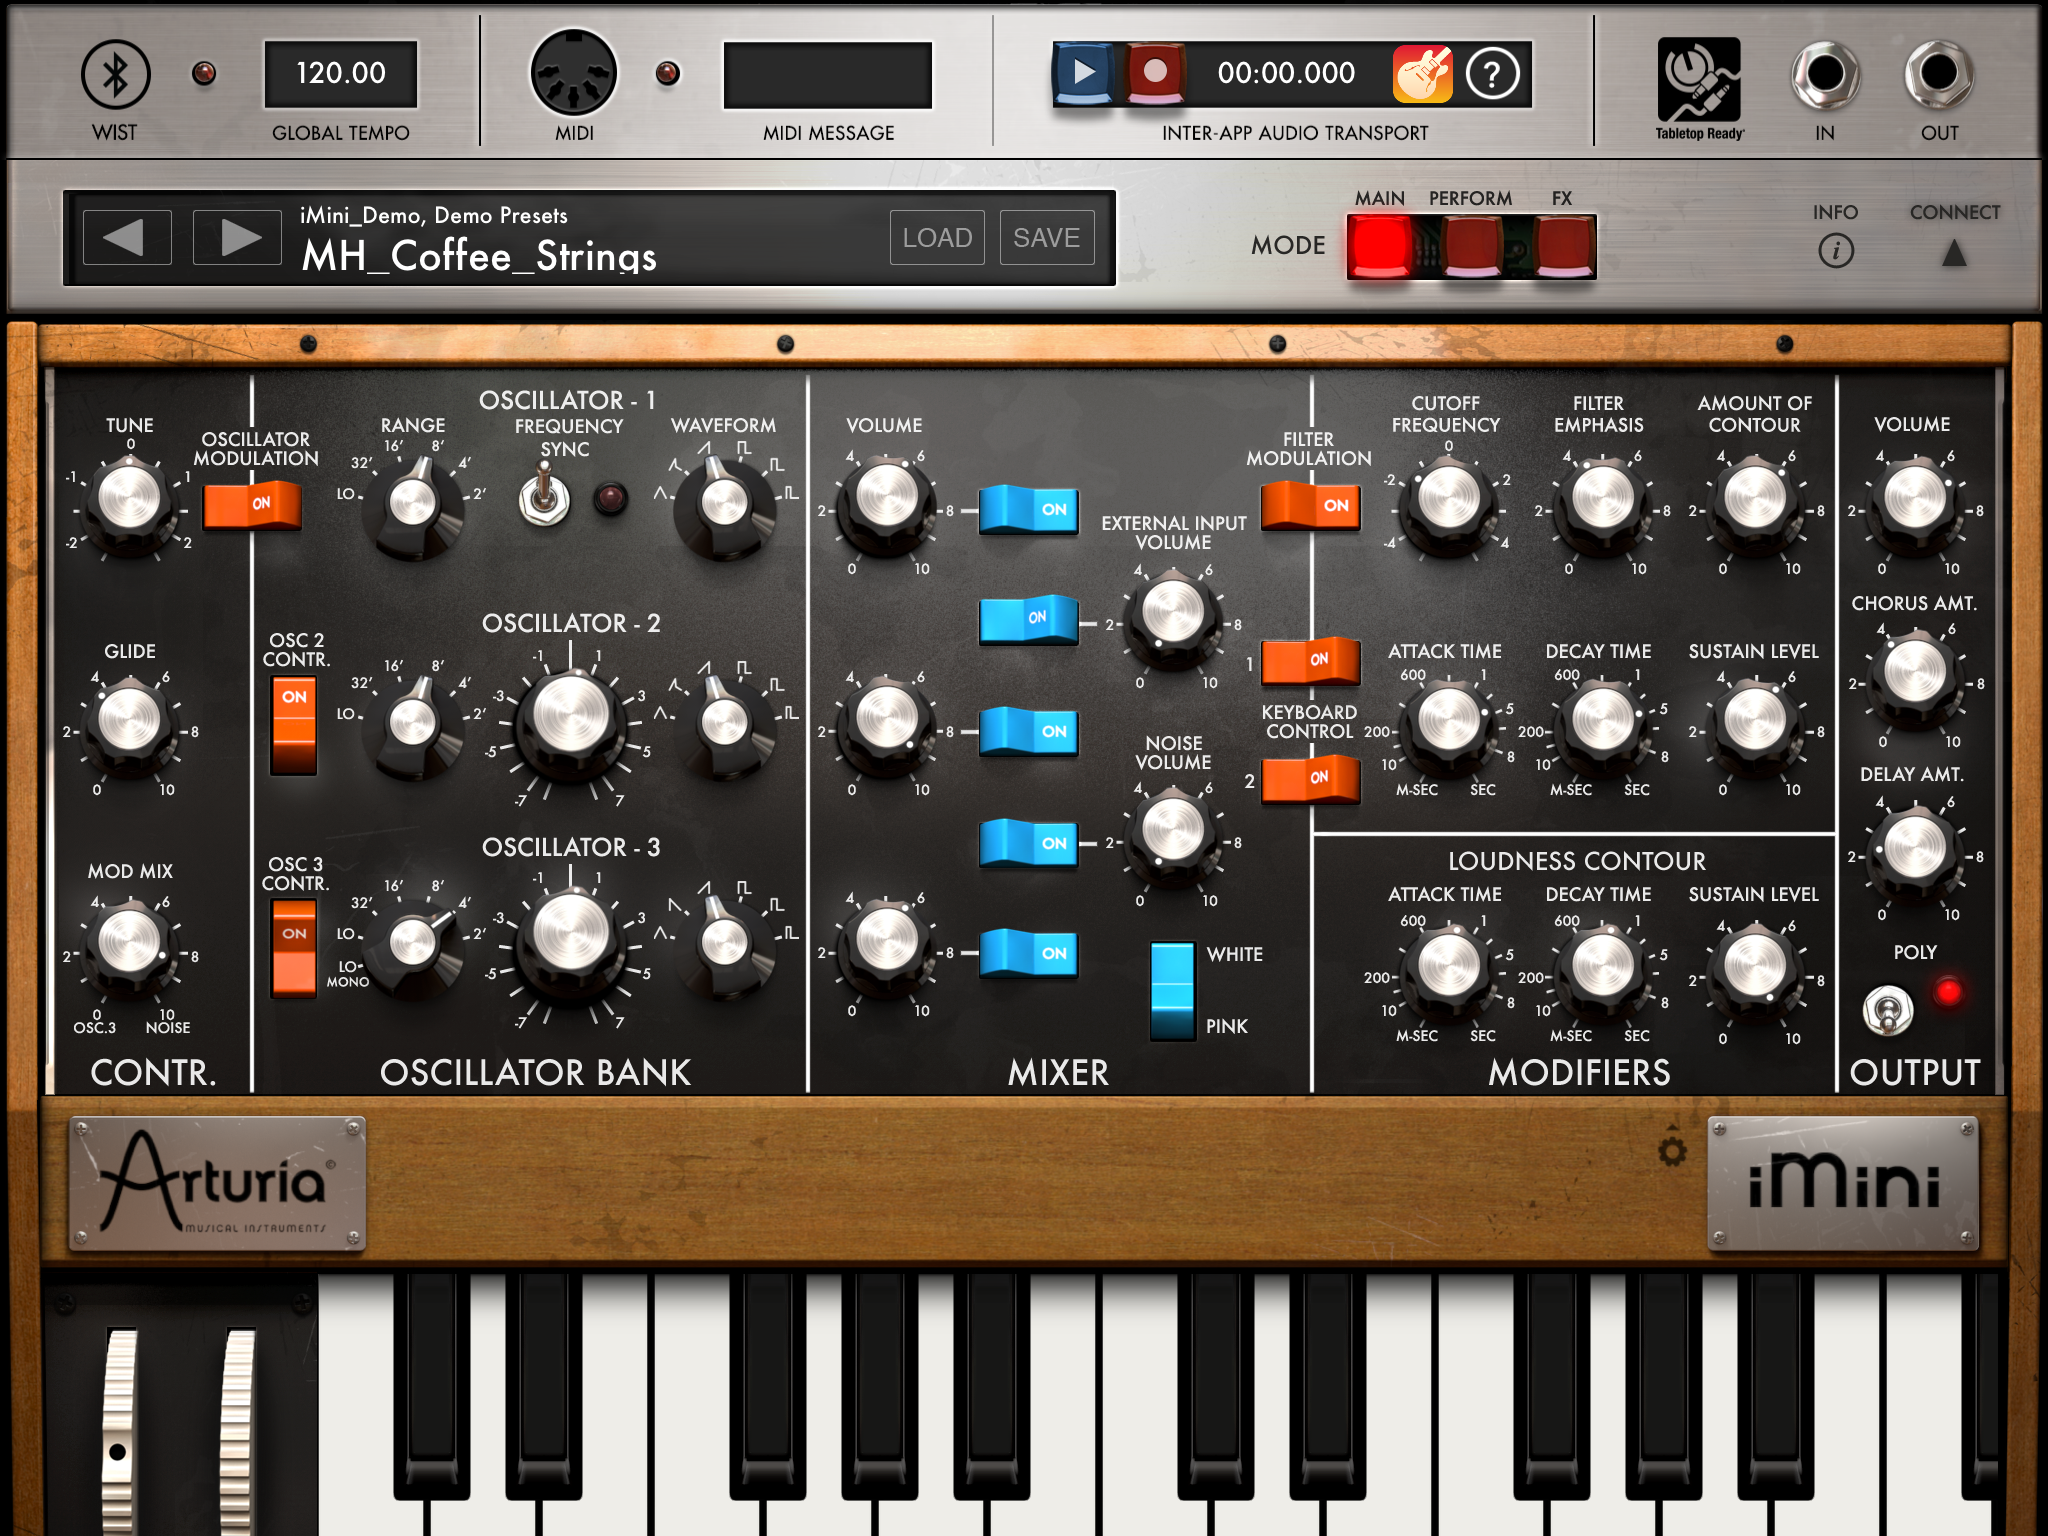
Use this instrument to get GarageBand to work in tandem with other music-making apps. Inter-App Audio connectivity is a relatively new feature that was added in iOS 7, and only a handful of apps support it so far. Those that do include the Arturia iMini (shown **where**), a superb emulation of the classic Minimoog analogue synthesizer, and IK Multimedia Amplitube, a guitar amp simulator that goes much further than GarageBand’s Guitar Amp instrument.
When you select this instrument, GarageBand will list any compatible apps. Simply select one to load it and hit record when you’re ready. It’s worth noting that GarageBand records the audio signal and not the notes played, so you can’t go back and readjust synthesizer settings or edit the performance. Think of it more like recording an external acoustic instrument rather than using one of GarageBand’s virtual instruments.
Apple Loops
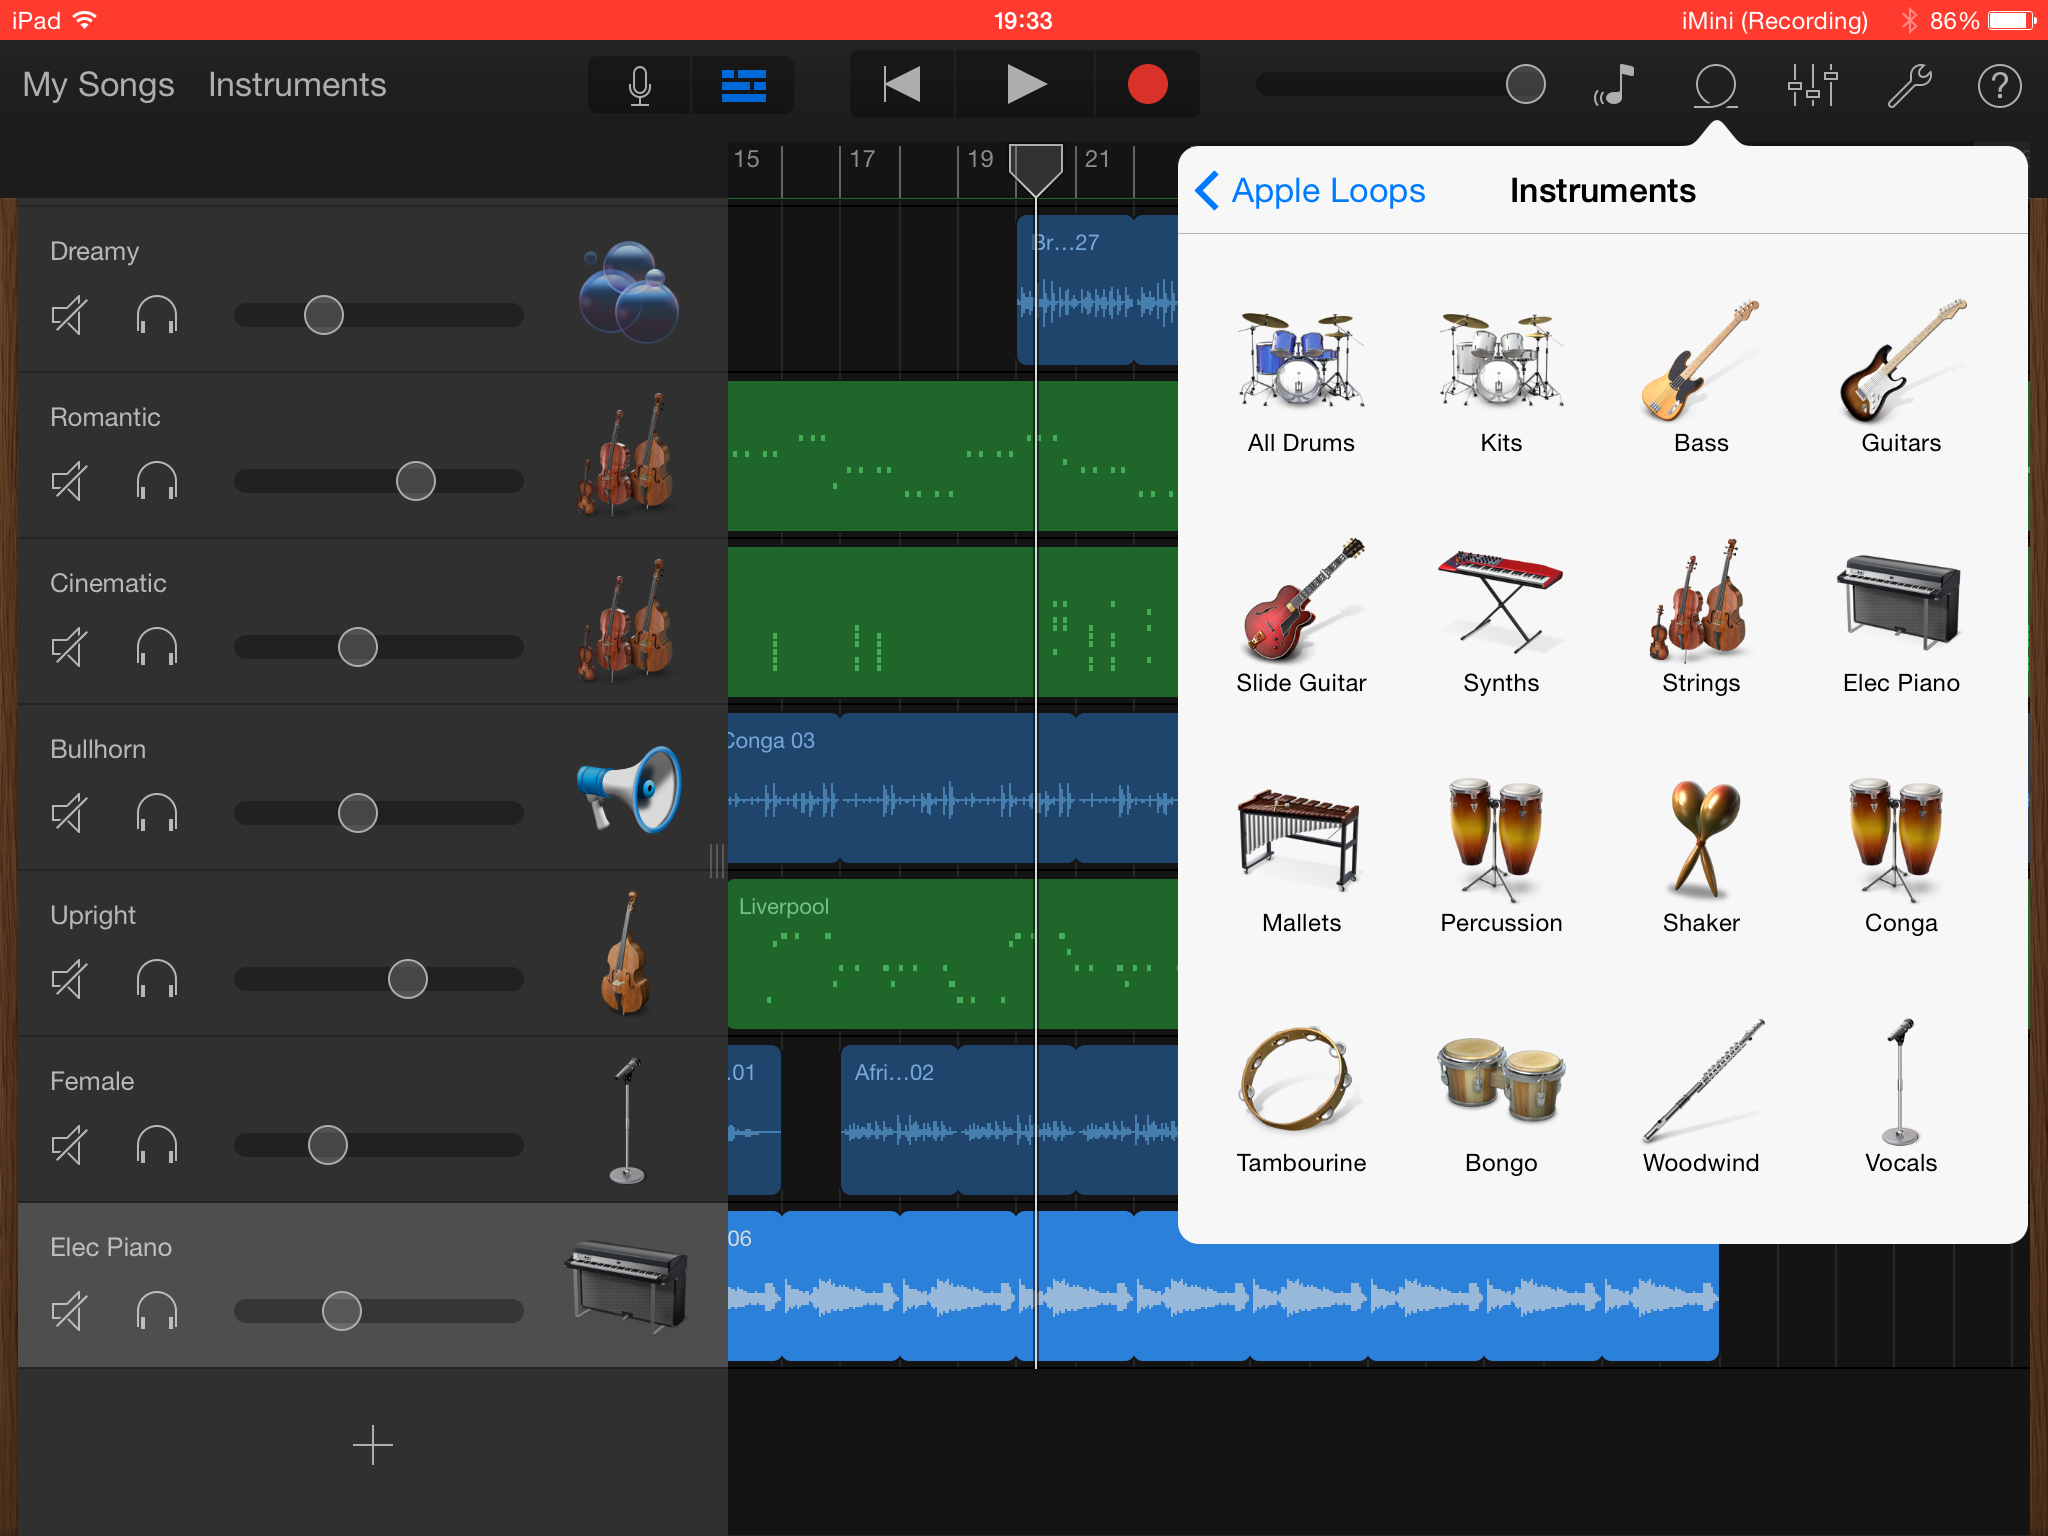
These don’t appear as an instrument but they’re another way to add sounds to your composition. Apple Loops are pre-recorded samples of short musical phrases. They’re automatically stretched to fit the time and key signature of your track, and they’re designed to loop as necessary. The downside is that stretching samples can have an adverse effect on sound quality. Depending on how much they’ve had to be stretched, they may sound grainy and garbled.
Tap the sequencer button (the icon that resembles bricks) followed by the loop-shaped icon. You can then search the loop library by instrument type, genre or descriptors such as Ensemble, Dry and Intense, or use the text search facility. Tap a loop to audition it, and drag the one you want to the sequencer. It will fill the entire track by default, but it’s easy to trim it to fit: tap once to select it, drag the right edge to resize and drag the centre to move it.
Editing and mixing
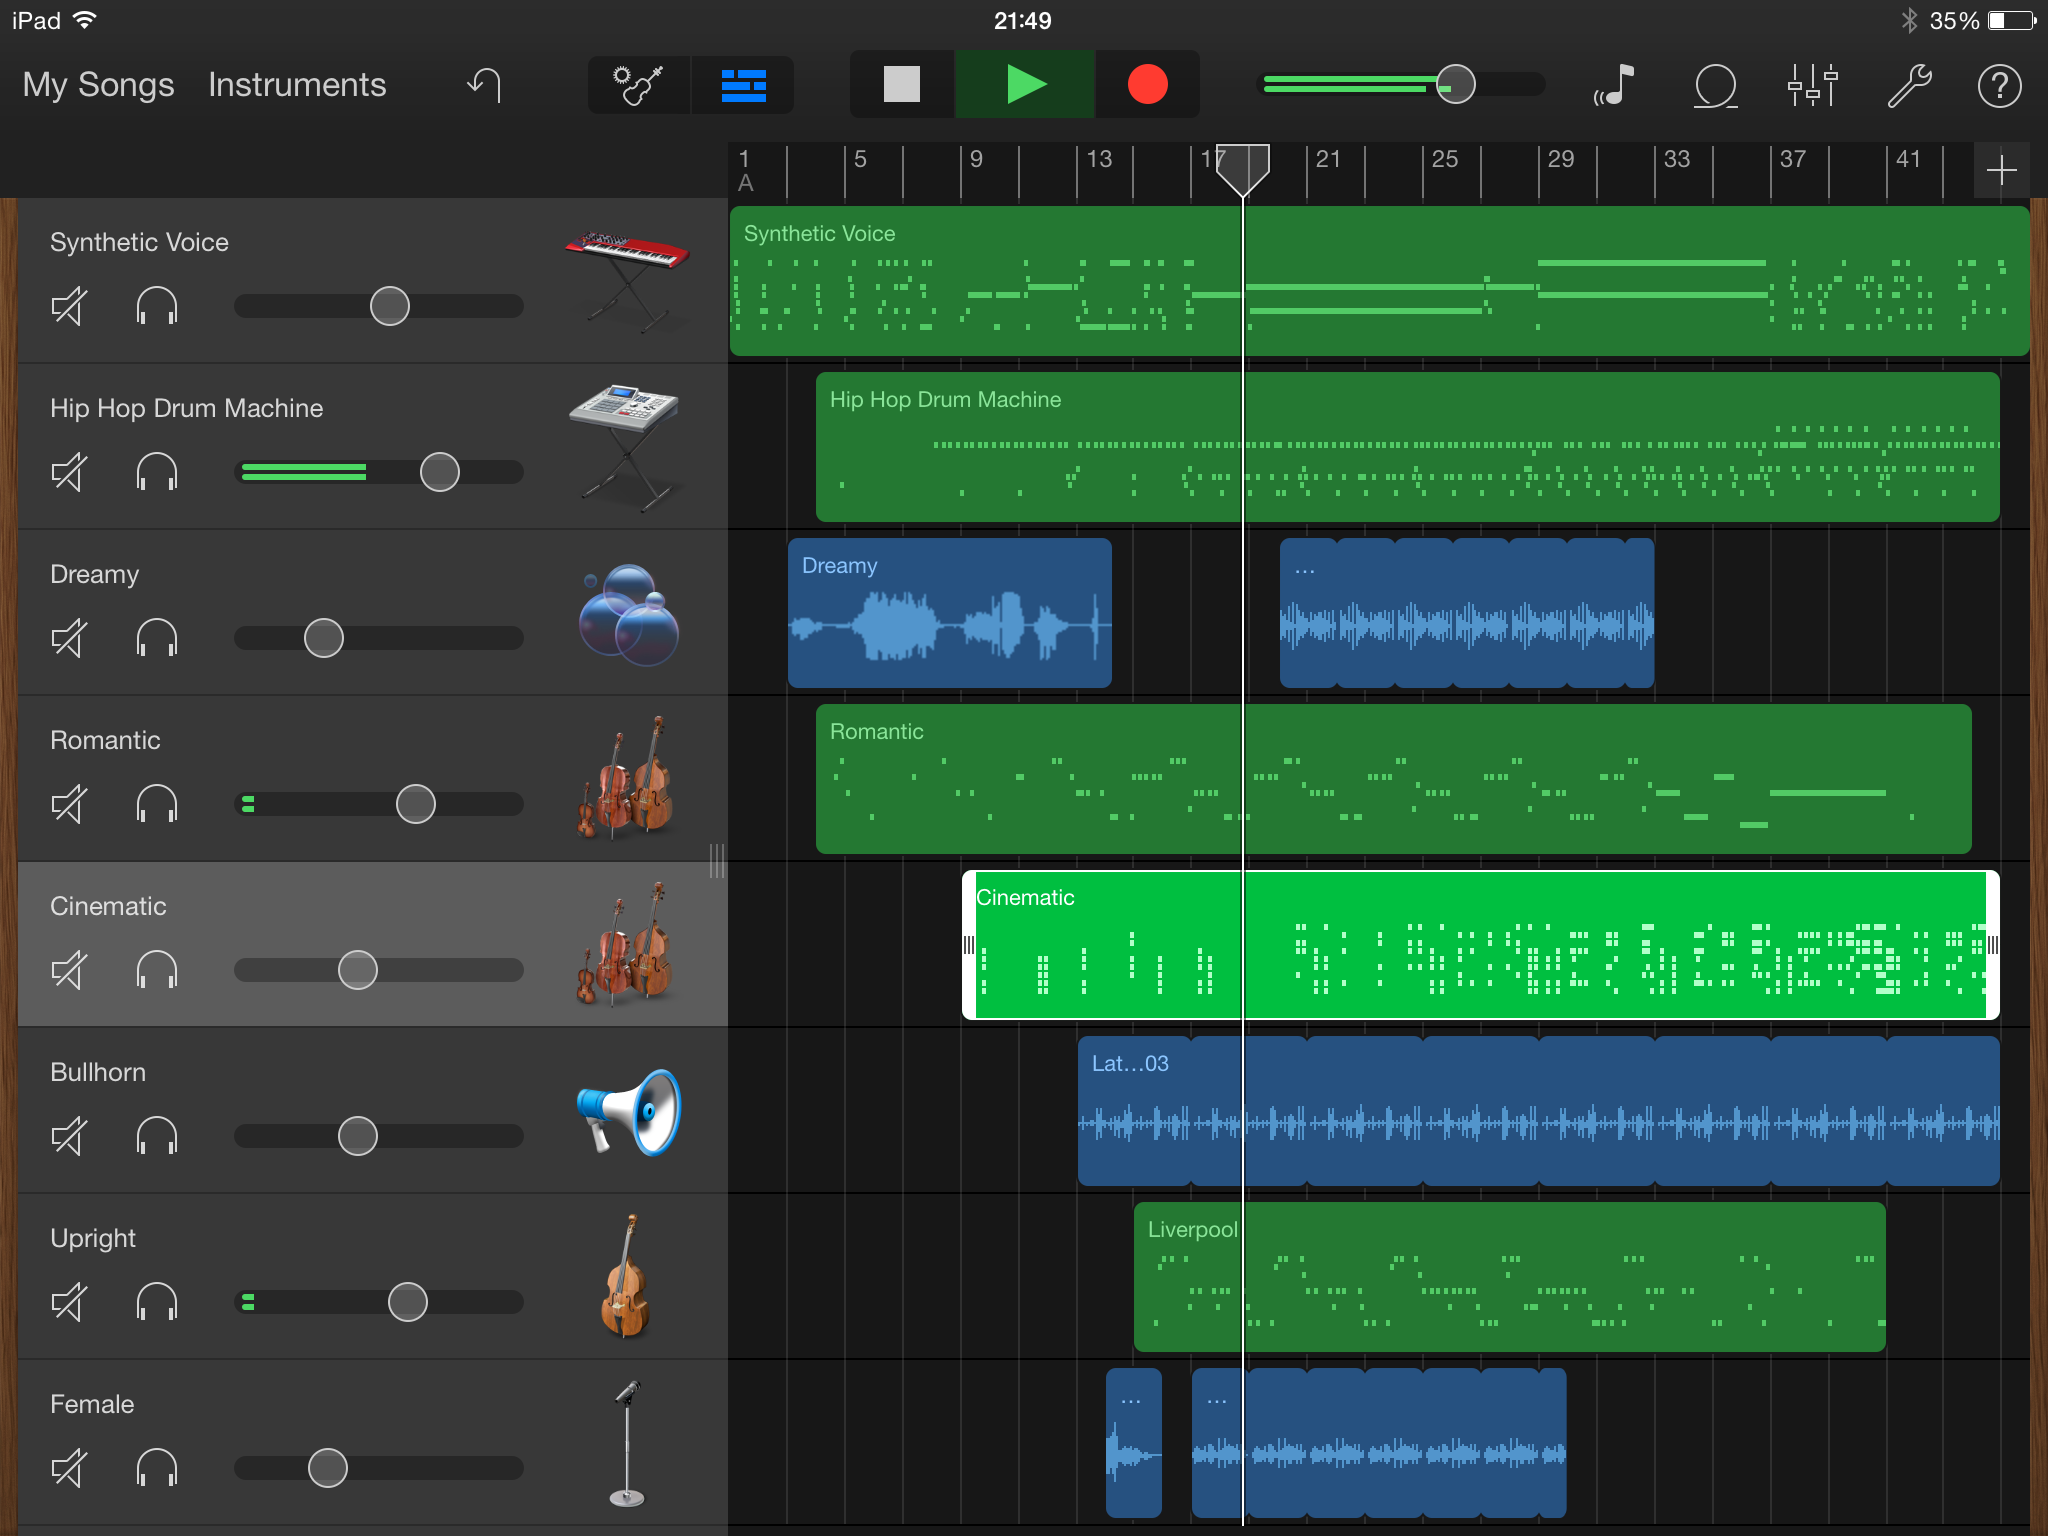
GarageBand’s editing and mixing facilities are relatively simple, but there’s enough here to get the job done. In the Sequencer, drag the bar on the left across to the right and you’ll see volume, mute and solo controls for each instrument. Tap the Instrument Settings button (the icon with three vertical sliders) to access additional controls for pan, echo and reverb for the selected instrument.
Tap an audio recording (represented by a waveform display) and you’ll see handles to adjust its start and end point. Tap it again to see additional options such as Copy, Split and Delete. Edits jump to the nearest grid position, but the more you zoom in, the finer the resolution of the grid.
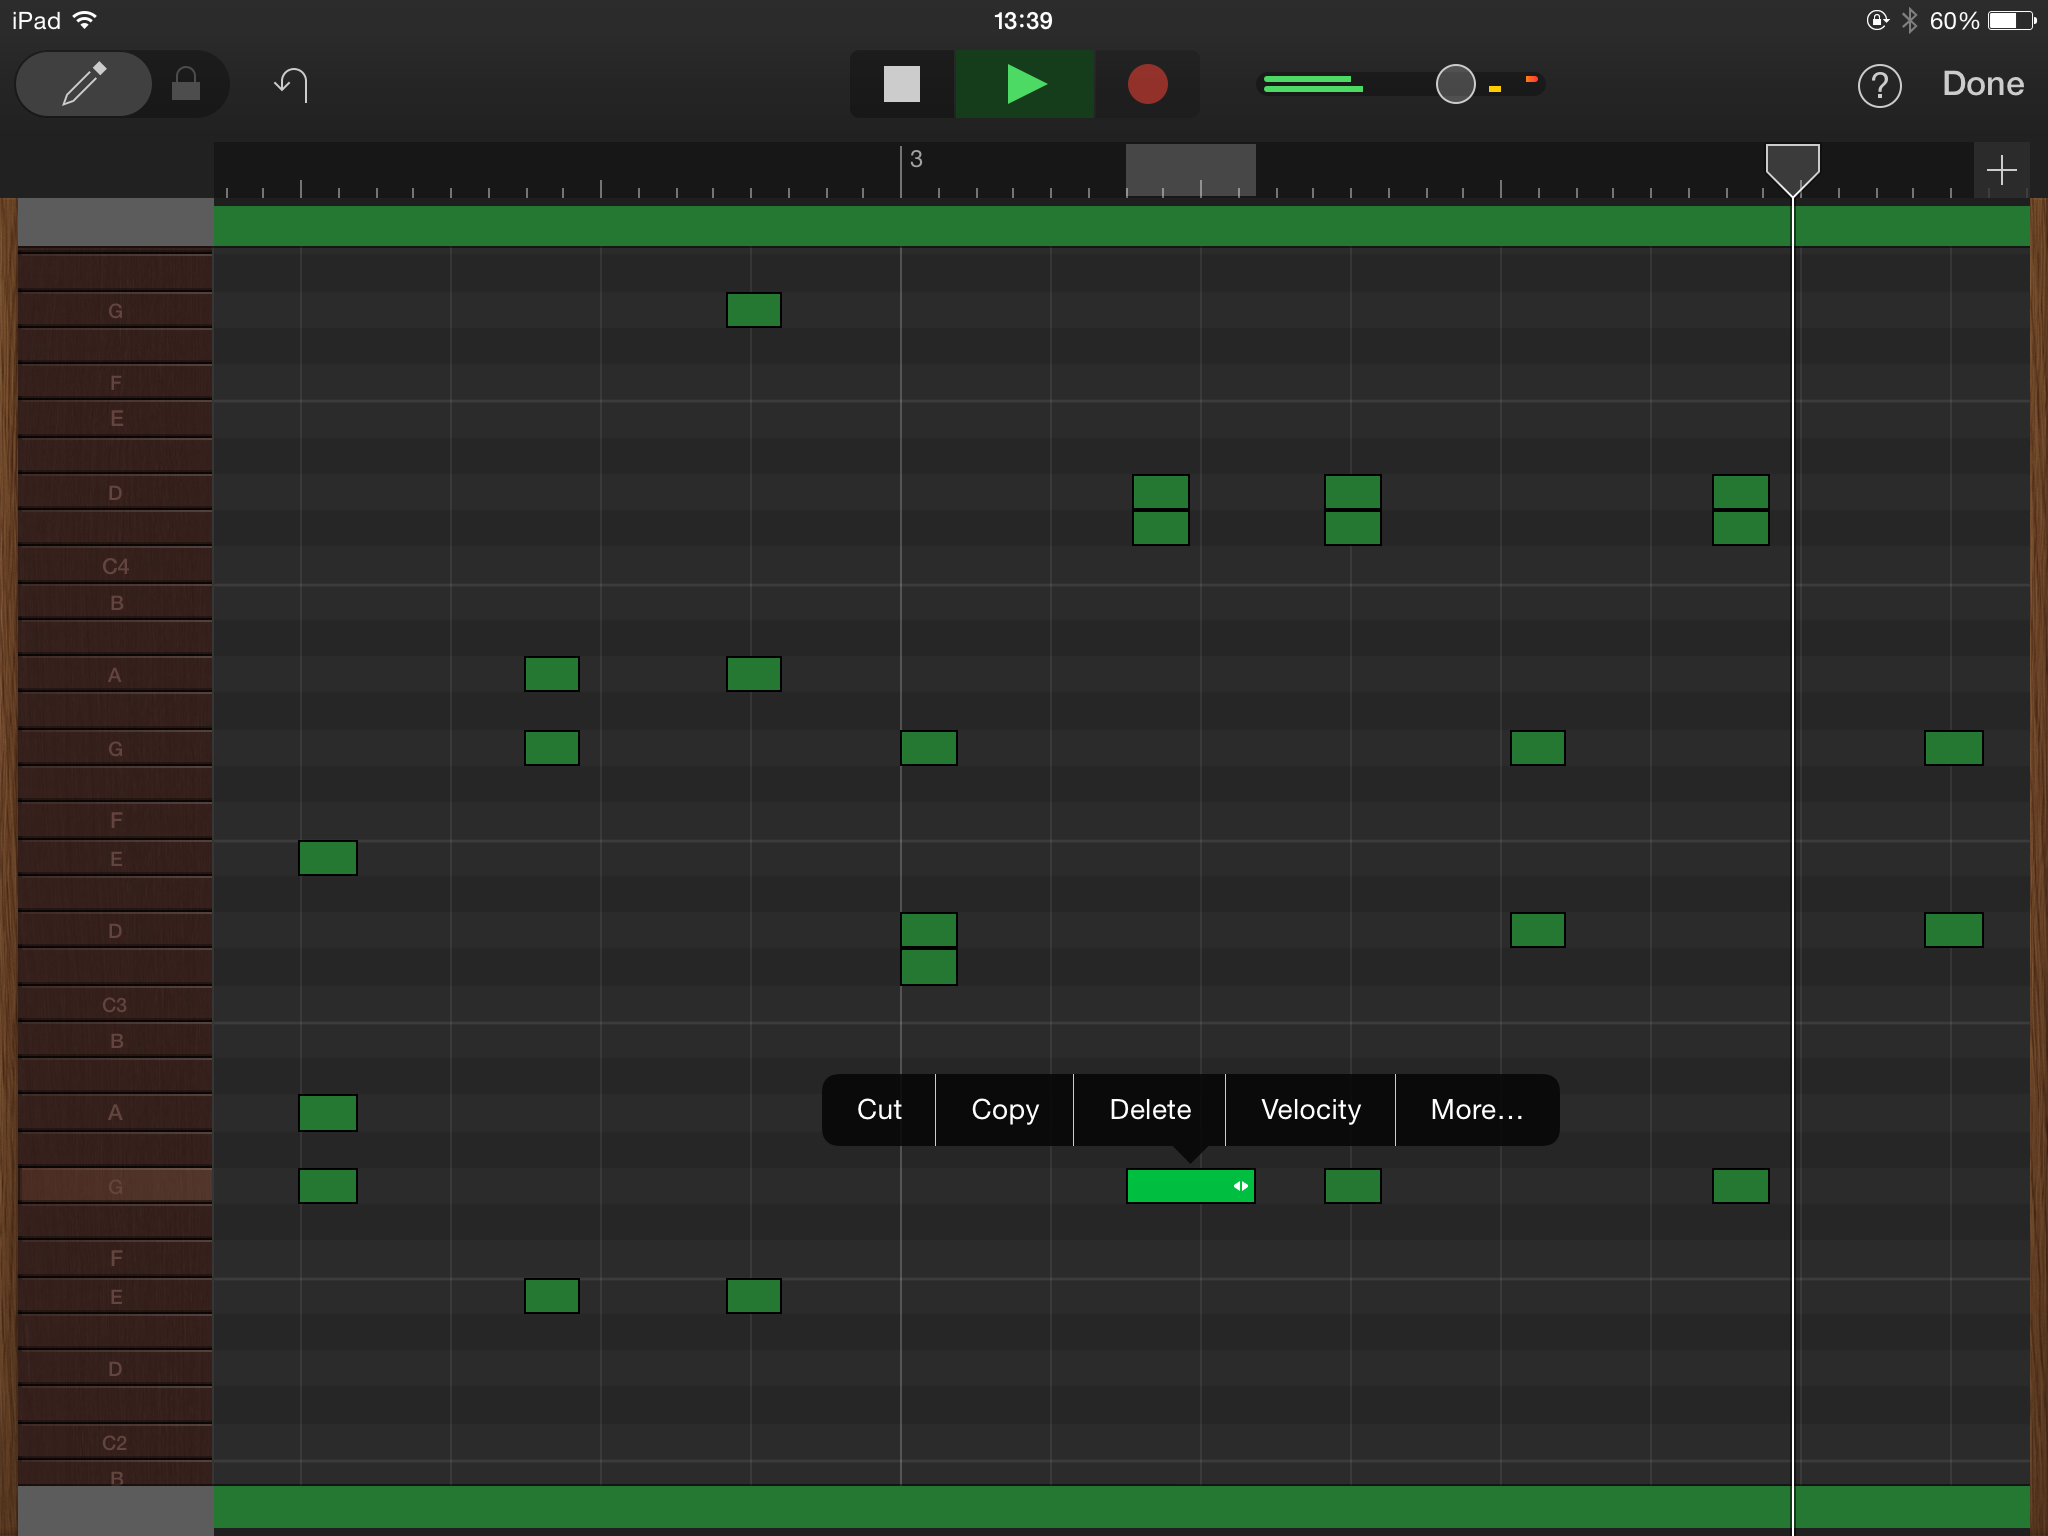
The Keyboard, Drums and most of the Smart instruments also include an Edit option. Tapping it reveals a piano roll-style editor where you can adjust the timing, length, pitch and volume of individual notes. There’s also a Pen mode for drawing notes directly, and it’s even possible to switch to a different instrument or playing style in the Smart Strings instrument.
When your song is complete, tap My Songs to return to the song browser. Tap Select and select a song and you’ll see options to export to various destinations, ready to dazzle your friends with your newfound musical prowess.
There are areas where GarageBand could be better, the most obvious one being its limited mixing facilities. However, there are so many ingenious music-making tools here – and so much fun to be had – this it’s impossible to be downbeat about it. It’s quite possibly our favourite iOS app.
