How to Set Up a Ring Doorbell
Our guide on setting up your Ring doorbell so you can always see what’s going on at home
Ring doorbells make it easy to keep an eye on your front door, even when you’re away from home. These video doorbells replace traditional ones so that you’ll receive a notification on your smartphone when someone presses the Ring. The other huge advantage of Ring doorbells is that they can detect motion, giving you a live view of your porch and anyone unwanted who might be hanging around.
Ring doorbells connect to the internet via Wi-Fi and come in both battery and wired versions. They are weather resistant and are equipped with infrared LEDs to enable night-vision recording. Ring doorbells can also be partnered with home security cameras to create a home security system. They’re a fantastic idea for many homes but, once you’ve purchased a doorbell, how do you install and set it up? This guide should give you all the tips you need for perfect installation.
What are the different types of Ring doorbell?
The first step in installing your Ring doorbell is knowing which model you’ve got. Basic installation for all the battery-powered doorbells is the same, but some models – such as the Ring Video Doorbell Elite, or the wired models – may require professional installation.
Here’s a list of the current Ring doorbells:
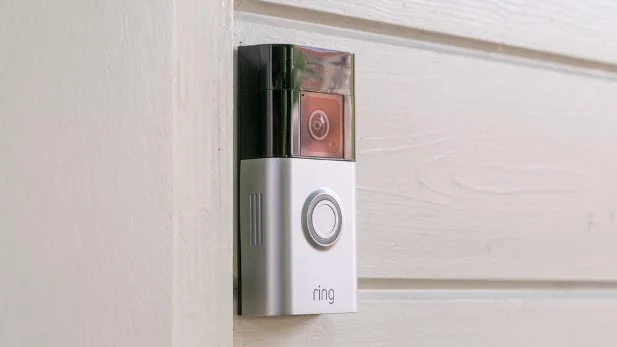
- Video Doorbell (2nd Gen)
- Battery Doorbell Plus
- Battery Doorbell Pro
- Peephole Cam
- Video Doorbell Wired
- Wired Doorbell Plus
- Wired Doorbell Pro
- Video Doorbell Elite
How to install a Ring video doorbell
Ready to install your new Ring video doorbell? These simple steps should make things easy:
1. Gather your tools
Each Ring doorbell kit comes complete with pretty much everything you need to install it, including detailed instructions, screwdriver, screws, and charging cables (if applicable). But you will still need to remove your old doorbell (if you have one) so we recommend having a box cutter, a flathead screwdriver, and a Phillips screwdriver to hand. You’ll also need a drill if you’re going to screw the Ring into brick or stucco. The Video Doorbell (2nd Gen) and the Doorbell Pro do come with a special masonry drill bit to make this easier, but you will need your own drill for other models.
2. Charge the battery
Once you’ve unboxed your Ring, you’ll need to locate the battery and plug it in to charge using the included charging cable. It can sometimes be a bit fiddly to get the battery out so, if you’re having problems, the trick is to hold the doorbell flat against a wall. The wall helps push the battery out, with gravity doing the rest.
Once the battery is plugged in, you’ll see a red light and a green light, indicating that the battery is charging. Once it’s finished charging, the red light will turn off, leaving only the green on to tell you that the battery is ready to go. Click the fully charged battery back into the doorbell.
3. Download the Ring app
The Ring app is available in both iPhone’s App Store and in Google Play for Android phones. Follow the instructions to download. Once the app is open, it will ask you to start by scanning a QR code using your smartphone. Do note that on some models this is located underneath the faceplate.
You can view a live feed, receive alerts, and talk to visitors using the Ring app without paying a monthly fee. However, if you want to record, save, or share video then you’ll need a subscription. A subscription to the Basic level of Ring Protect starts at a very reasonable $4.99/mth, and also includes features like person detection, package alerts, and photo-preview notifications. Meanwhile the higher tiers – Plus and Pro at $10 and $20 a month, respectively – give you access to things like a multi-camera live feed, picture-in-picture, and customized automations. On the highest Pro level, you can even have 24/7 alarm monitoring that requests dispatch of real-time emergency responders to break-ins or security threats, though that may be a bit much for the average homeowner.
4. Connect to the internet
Your Ring app will be able to walk you through how to connect the doorbell to the internet and your home’s Wi-Fi network. It’s important to be as near as possible to where the doorbell is going to be mounted when you connect it to the Wi-Fi so that you can check if you have a strong enough signal for the doorbell to work.
If the Wi-Fi signal is too weak, you can either buy a standard Wi-Fi extender, or consider investing in a Ring Chime. The Chime not only boosts Wi-Fi signal but also works as a doorbell chime (something you might have guessed from the name).
5. Shut off power
If you’re replacing an existing doorbell, you’ll need to shut off the power to your doorbell before you start working with electrical wires. Locate your home’s breaker box – it’s normally at the rear of your home, or in a garage or basement – and shut off the power to the doorbell.
Obviously, if you’re not replacing an existing doorbell, you can skip this step. It’s also not essential if you’re mounting a battery-powered doorbell.
6. Remove the old doorbell
If you don’t feel comfortable with this, it’s best to get a professional installer in to deal with the exposed wires. However, if you are confident and have the right knowledge, you can remove your old doorbell yourself. Start by using a screwdriver or a boxcutter to remove your old doorbell’s faceplate and expose the screws. Unscrew the old doorbell and pull it out very gently. This will expose the two power wires that will be wound around screws on the inside of the old doorbell. Loosen these screws and detach the wires, taking great care as you can damage them if you pull too hard.
7. Attach the mounting bracket
Before you actually attach the mounting bracket, you need to make sure that you’re getting the angle of view that you want. Open the Ring app on your phone and access the doorbell’s live video feed, holding the Ring doorbell up against the hole where it’s going to be mounted.
If the existing hole gives you the view you want, use the included level tool to make sure that the mounting bracket is straight and mark the location of the new screw holes with a pencil. Once they’re marked, you can remove the level and screw the mounting bracket directly over the existing doorbell hole.
If you need a different angle, use one of the angled mounting brackets that come with the Ring doorbell to tilt the camera up, down, left, or right. Attach this bracket first, by screwing it in, then attach the mounting bracket to it.
If you’re installing the doorbell on brick or stucco, you may need to use the included masonry drill bit to drill holes. Once you’ve drilled the holes, push in the small, white plastic anchors that will hold the screws in place, position the mounting bracket on top of them and then screw in the mounting bracket screws provided.
Whichever method you’re using, don’t tighten the screws too much as you don’t want them to start bending – this could make it difficult to attach the doorbell.
8. Attach the doorbell wires
If you’re using a wired Ring doorbell, you will need to attach the wires. It’s optional with a battery-powered Ring doorbell, but if you do connect the wires, it will prolong the battery life. Loosen the two screws on the mounting bracket located directly over the hole where the wiring is sticking out of the wall. Take the wires and wrap one around each screw, making sure that the wires aren’t touching. Check that the wires have a good connection to the screws and tighten the screws gently, if needed. This closes the circuit, wiring your Ring doorbell to the powerline.
9. Mount your Ring doorbell and turn on the power
You’re now ready to mount your Ring doorbell. This is very simple: position the doorbell above the bracket then press in and down until it clicks into place (you might need to use a little force).
Next, turn your breaker switch back on and check that everything is working, with the doorbell chiming in the house – if it’s not, you’ll probably need to double check your connections are secure. Once you’re happy with everything, screw the two security screws into the underside of the faceplate using the smaller end of the included screwdriver.
10. Set your app preferences
Lastly, set your preferences in the Ring app – choose what notifications you want to receive, set up motion detection, night vision, and which areas you want your camera to cover.
Your Ring doorbell is now completely set up and you can relax, safe in the knowledge that you can see everyone who’s coming and going from your front door.


