How to save Instagram photos to your PC

Backup and save all of your favourite Instagram shots with our guide on saving them to your computer
Part of the appeal in using Instagram to share your pictures is that it’s simple; take a photo or video and it’s automatically uploaded to your account to be shared with others. All of your photos are stored in the cloud, and they may also be saved on your phone, but what if you want to protect your memories by backing everything up? In this workthrough, we show you how to copy Instagram photos to your PC.
Step 1: Save original photos
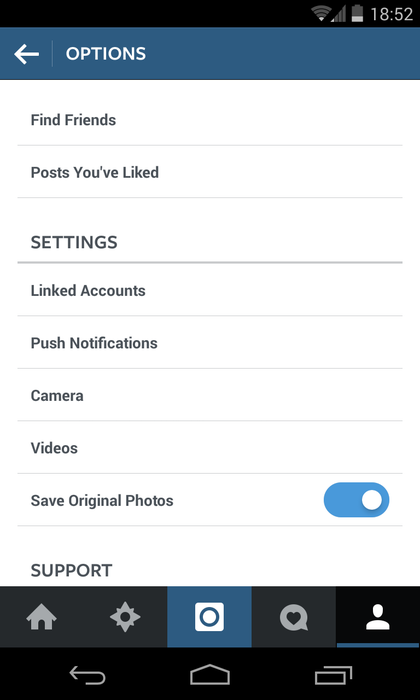
The best way to get a full-resolution copy of your photos is to ensure that the app is saving your original photos from the outset. Take a photo, and check that it appears as a full-size rectangular (not square) image within the Camera Roll (iOS) or in the Gallery or Photos app (Android). If not, open Instagram and tap the profile icon at the bottom right, then the menu icon at the top right, and check that Save Original Photos is switched on.

Step 2: Save Instagram photos from an iOS device
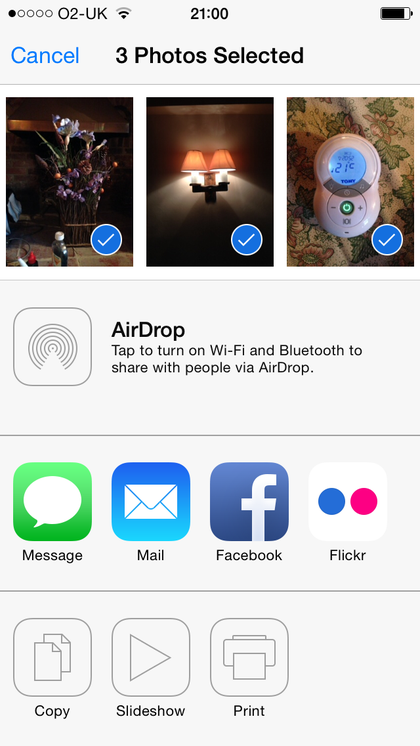
If you have an iOS device you’ll find Instagram pictures within the Camera Roll. If you have only a few shots to backup, navigate to the first photo and tap the action icon at the bottom left, then scroll through your photos at the top selecting any others you want to copy. When you’ve finished, tap the Mail icon and send them to an email address you can access from your PC.
Alternatively, Mac Users can copy the photos out of the iCloud section of iPhoto; PC users can download and install the iCloud Control Panel for Windows. The photos will synchronise to your computer, so you can copy them off and store them where you like. Alternatively connect your phone to your computer via USB and browse to the DCIM folder and copy the photos you want off of the device.

Step 3: Save Instagram from an Android device
If Save Original Photos is on and you have an Android device, you can find your Instagram photos in the Gallery or through the Photos app. Note that the original photo will appear in the Camera folder, whereas Instagram’s square version, complete with any other edits, is saved in the Instagram folder – you may wish to back up either or both.
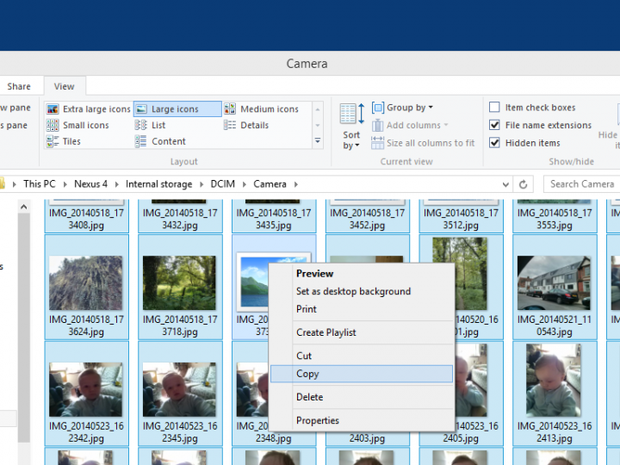
Browse to the photo or photos you want to backup and long-tap each to select it. When you’ve finished, tap the Mail icon and send them to an email address that you can access from your PC. Alternatively, unlock the device’s screen and connect it to a PC over USB, then use Explorer to browse to the DCIM folder and the Camera folder within it, or browse to the Pictures folder and the Instagram folder therein, then copy the contents to your PC.

Step 4: Use Instagrabbr
If you don’t want to enable Save Original Photos, or if you want a copy of photos taken before you turned it on, you’ll need to use a third-party service. We’ll look at two simple ones, each with different strengths. If you want to visually select a few photos to back up, visit www.instagrabbr.com, enter your Instagram user name and click Search. This should bring up your most recent photos – scroll down and click more photos if you want to see earlier uploads. Click a photo you want to backup and it will open in a new page, click the Save image button underneath it, and finally right-click the image and select Save Image As… It’s best to add a descriptive file name before clicking Save. Now click Back twice in your browser to return to your photos.

Step 5: Save Instagram photos using Instaport
If you want to backup photos en masse, or use simple search tools to find a group of images, visit instaport.me, click the Sign in with Instagram button and give permission when prompted for the service to access your basic Instagram information. Once you’ve signed in you can choose to export all of your photos, just those taken between certain dates, or any number of the most recent photos you took. Once you’ve specified which photos to export, click the Start Export button and be prepared to wait for a few minutes while the service prepares your download. When it’s finished, either click the green Donate & Download button, or the Download only link beneath it, and save the resulting Zip file to your PC.


